Porsche 911 Type Air-Cooled Cylinder Head Rebuilding
This covers all 911, 964 and 993 air-cooled cylinder heads.
This is an outline of how we go about the repair of these heads. We have been asked many times how we do this work. This will go through all the steps we take to ensure the heads are at their highest performance level and quality.
When the heads are delivered to us, the first part of the rebuilding is to establish what we are working with. Type, year, condition, and a basic brief from the owner. A good look at the heads shows any damage, often some idea of age and mileage incurred and a good idea of what we may expect needs to be done. Then we can give some sort of estimate as to what this may cost. We would waste a lot of time if the owner wants to pay a few hundred dollars for all the work but requires a high level of quality and performance. Once we have the heads at a point where we know exactly what needs to be done based upon measured condition, we quote the cost to do this work.


We then do a general cleaning of the heads in their assembled state. This removes the heavy dirt and gunk. We do not wish to contaminate our machinery and tools. We now perform a vacuum test on the valves which gives us a good idea on the condition of valve sealing. We do this so that we can relay back to the owner or shop that the cause of the performance degradation was or was not from the heads. This is when we can get some idea of how the heads sealed against the cylinders.
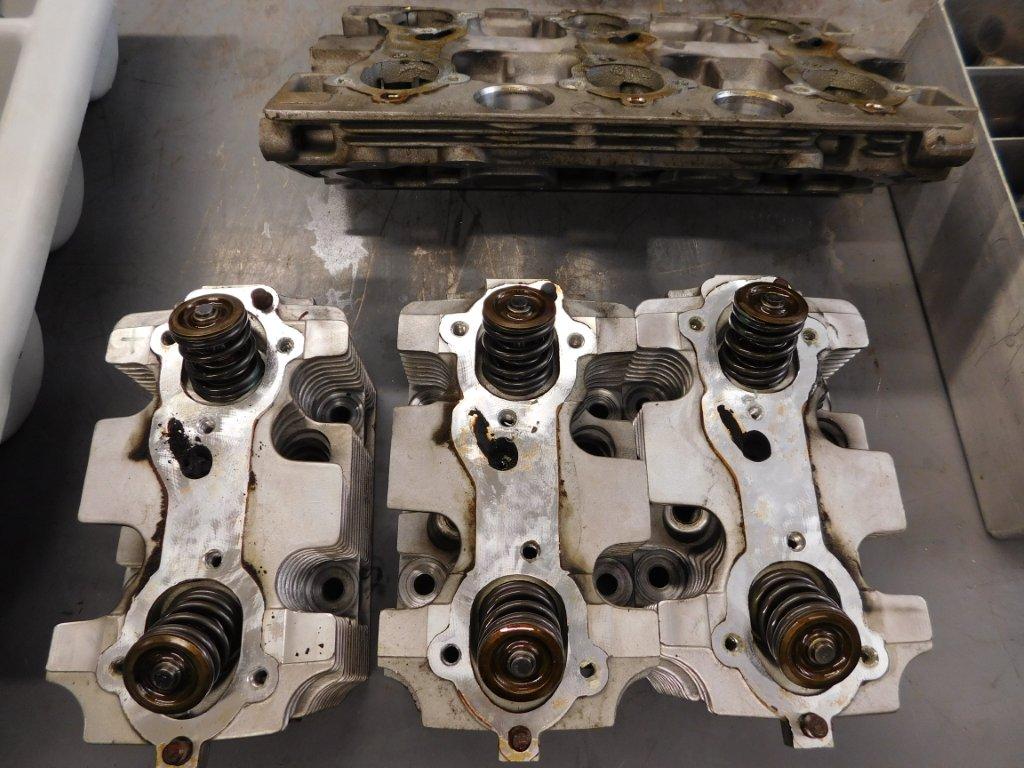
Once the heads are at least in a condition where they can be handled, they are placed on our assembly machine and disassembled. At this stage, we can see if the guides have any wear (the wiggle test) the valves, and their stems have any damage or wear, how the valves were seating and any damage to either the valve or seat sealing faces. This also gives us an idea of how much spring forces there were as a counting of the base shims gives a good idea of what the installed seat pressures were.

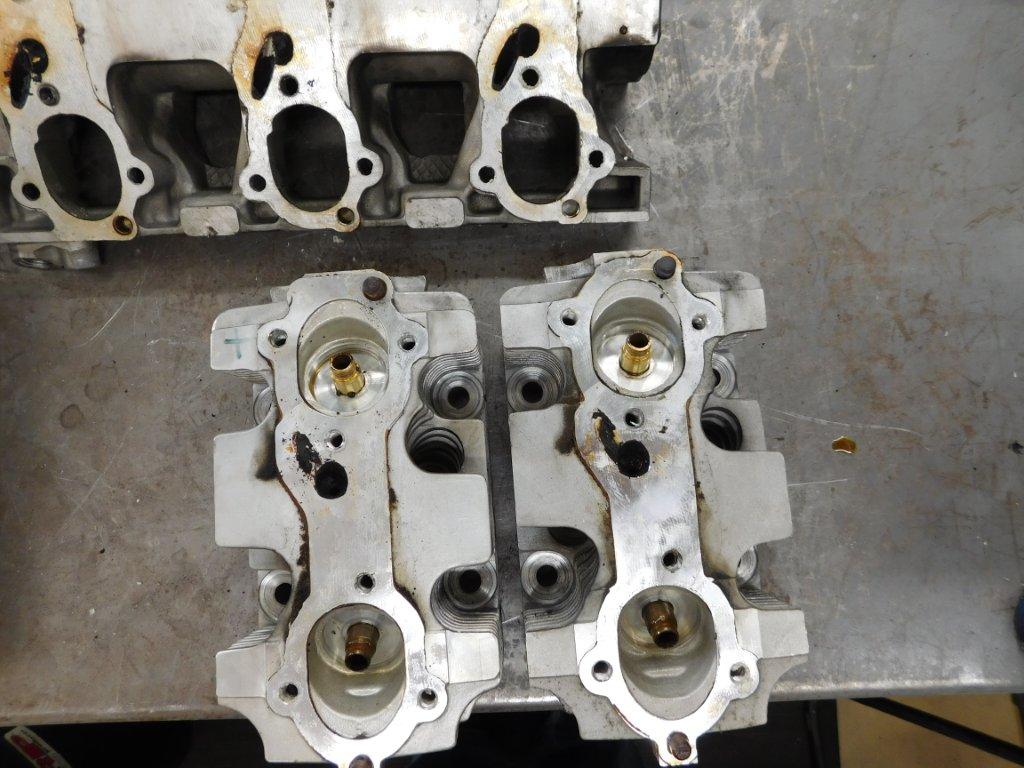
993 heads typical of the condition of head as they arrive. Note the EGR ports plugged with carbon.
Once we have all the parts disassembled the heaviest or most time-consuming part of the rebuilding process begins. The cleaning processes. Care must be taken here and just blasting them with sand is not in the heads best interest. Grit can be caught between the guide and the head which can fall out and into the combustion chamber, scoring the cylinder walls. Removing every piece of dirt, every particle of carbon, is intense time-consuming work. You cannot correctly check the heads for any damage with dirt covering any fault. Head exterior, ports, chambers and EGR ports all must be thoroughly cleaned. Valves, retainers, springs, spring bases, locks, and shims all must be cleaned and inspected. Hand washing in solvent, carbon removal often requires abrasive procedures, hot recirculating washers, and ultrasonic cleaning processes are all used.
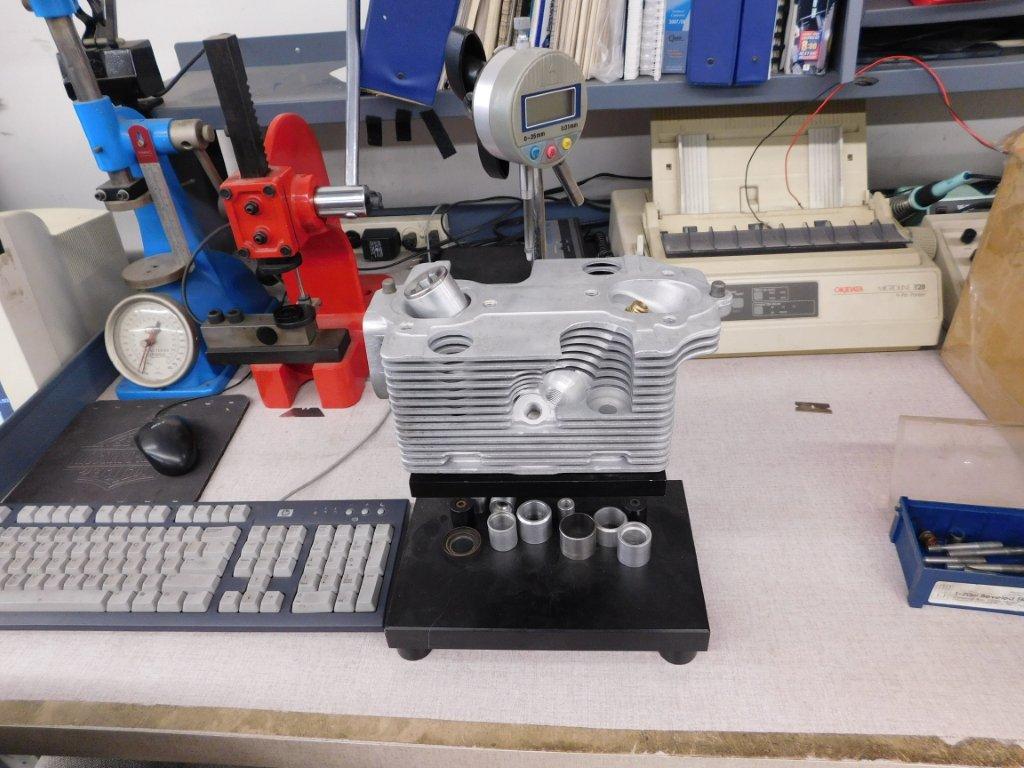
Now that the parts are thoroughly cleaned further inspections are carried out. Now is the time the heads are Zyglow crack checked (a nondestructive crack checking process), top spring retainers are magnufluxed checked, the valve guides bores measured for out of round and taper, valve stems measured for wear, valves measured for run out, valve seat heights measured to establish if another seat cut can be achieved without sinking them too deep or if they need replacing. We also test the valve springs for their rates to be sure we know their condition. Most of the time the springs are replaced as a precaution.
Now we know the exact condition of all parts and what repair work is involved, we assemble a written quote and contact the owner. Upon receiving authorization, we start the repair work.
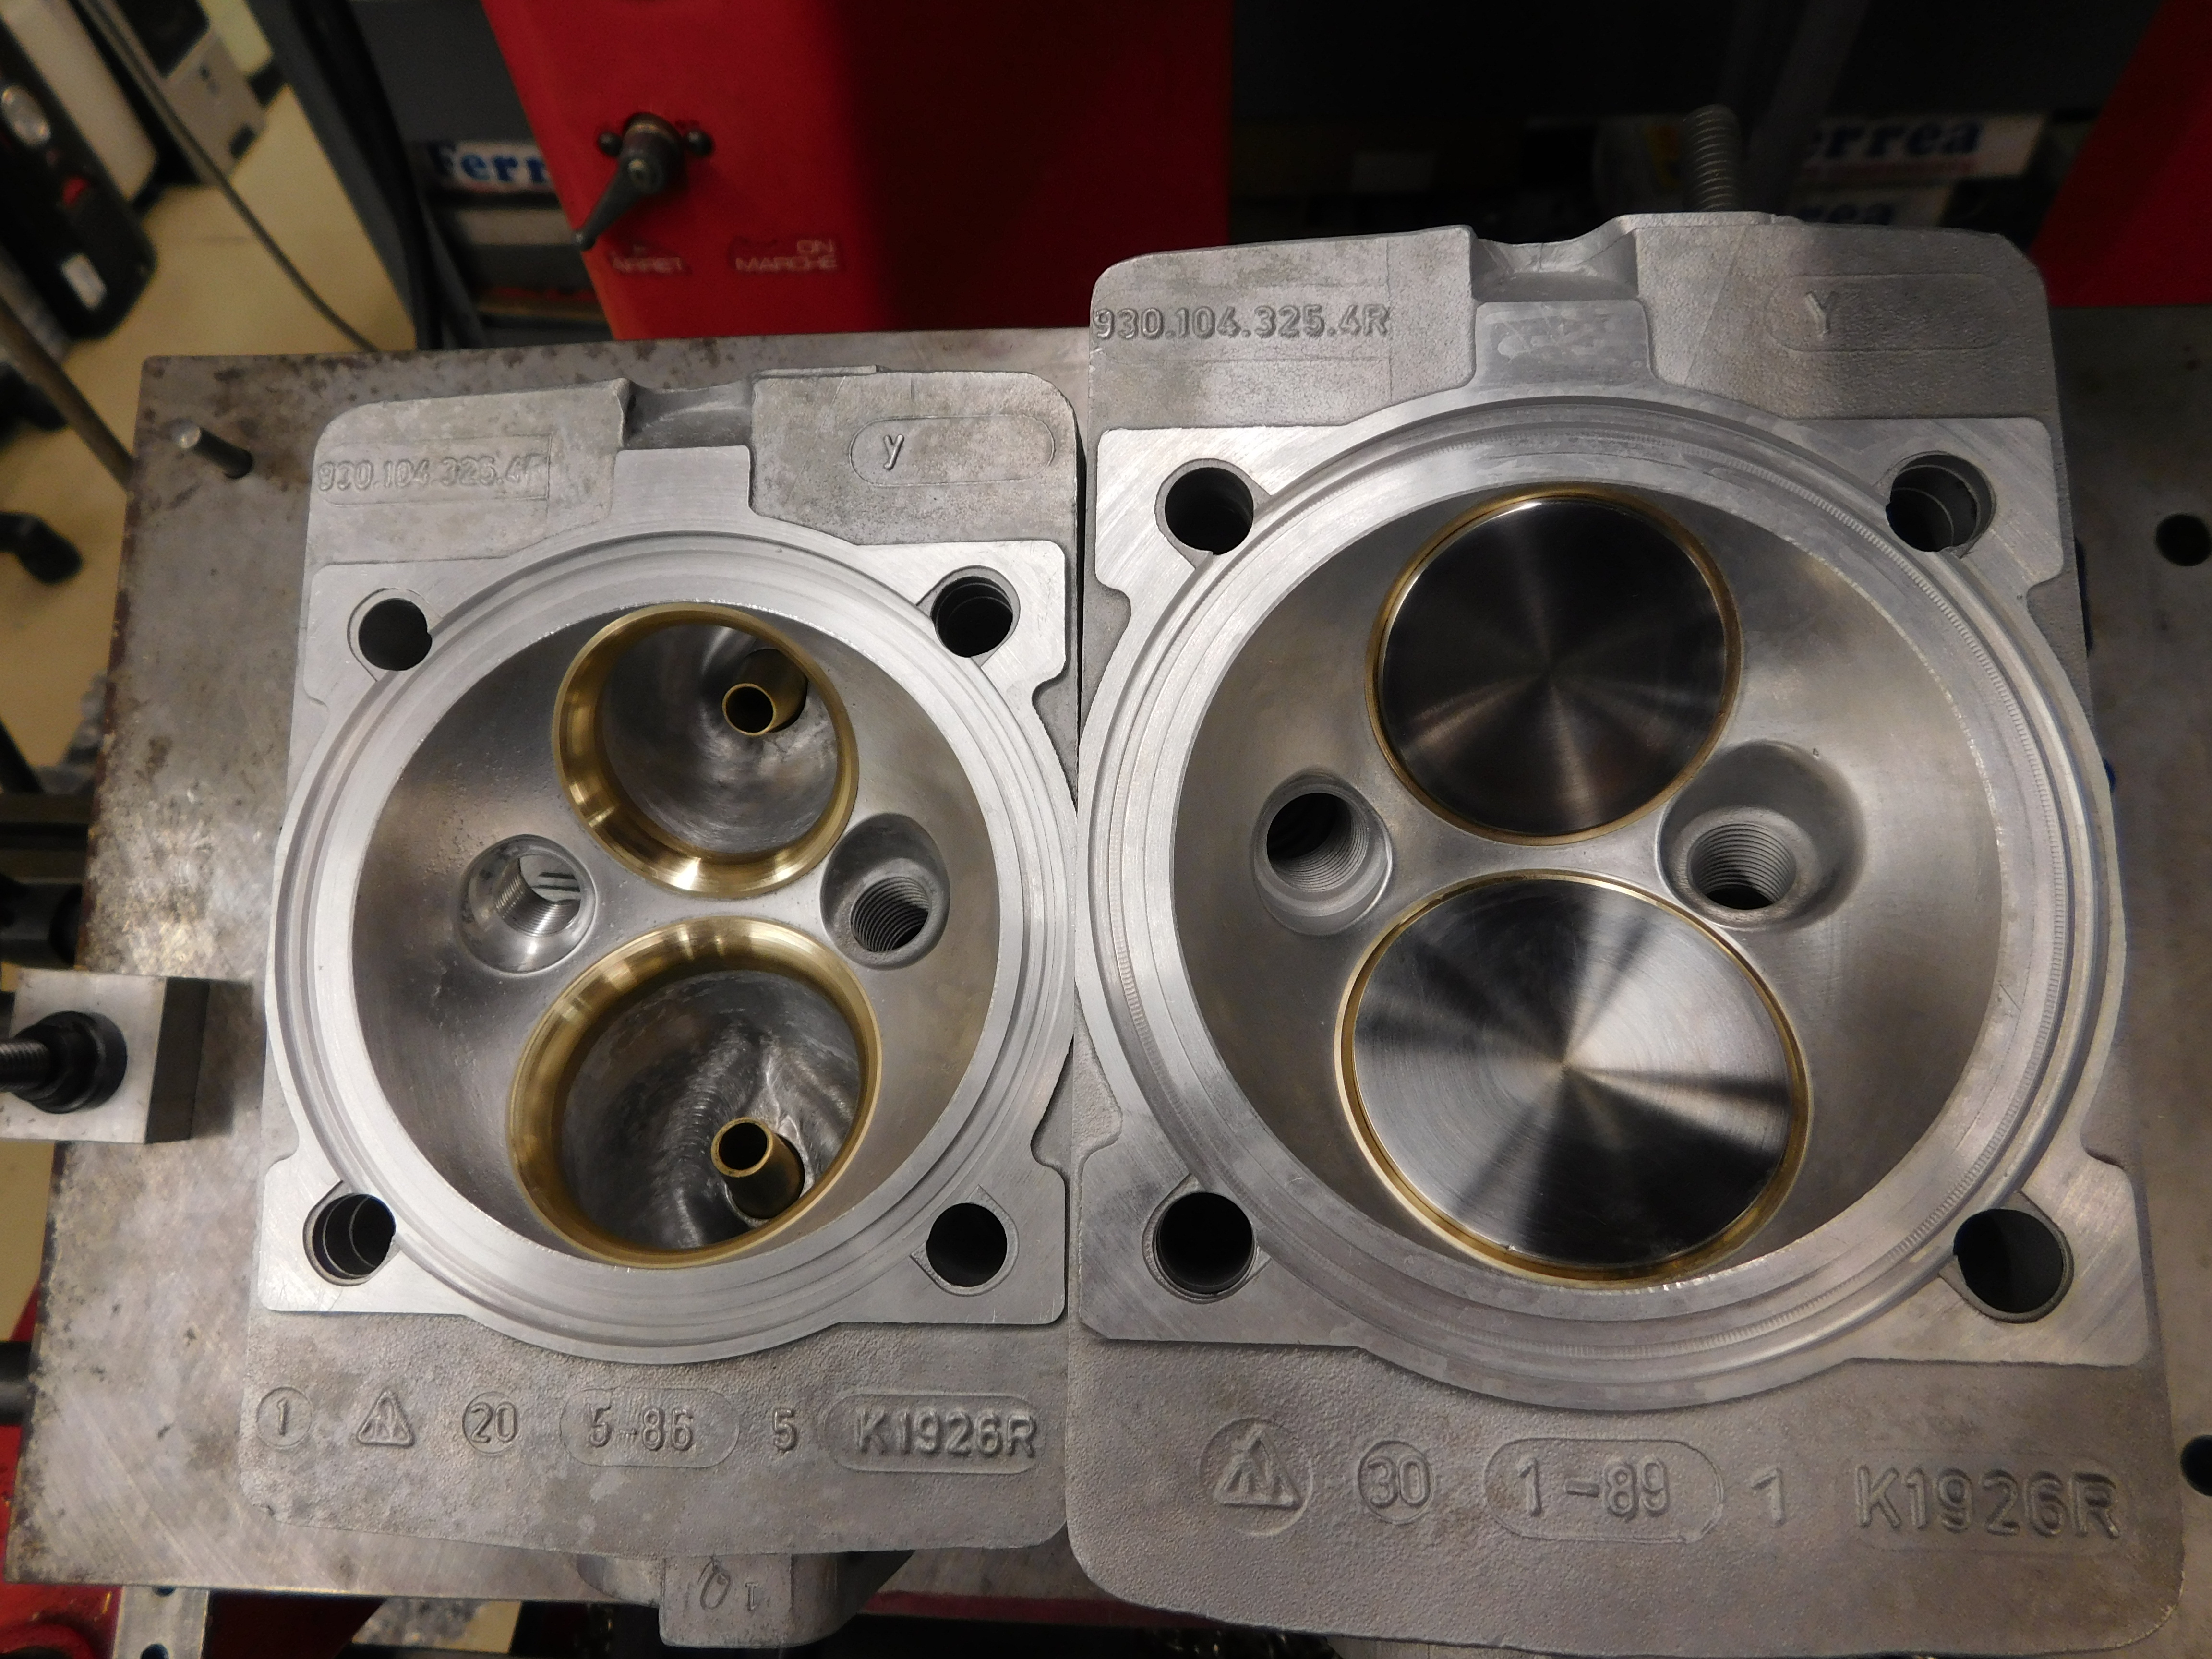
If the guides have no wear and have the correct amount of clearance to the valve stem, then the seats can be cut. Care must be taken to make sure you can get a full 45° cut on the existing seat without cutting the seat too deep. This requires the top angle or transition angle to be more acute so that it blends into the chamber. If you keep the existing top angle the same there will be a step to the chamber and when this happens the chamber will have to be cut to blend to the seat. The seat insert should be changed if the step is too large and cannot be blended without cutting away the chamber.
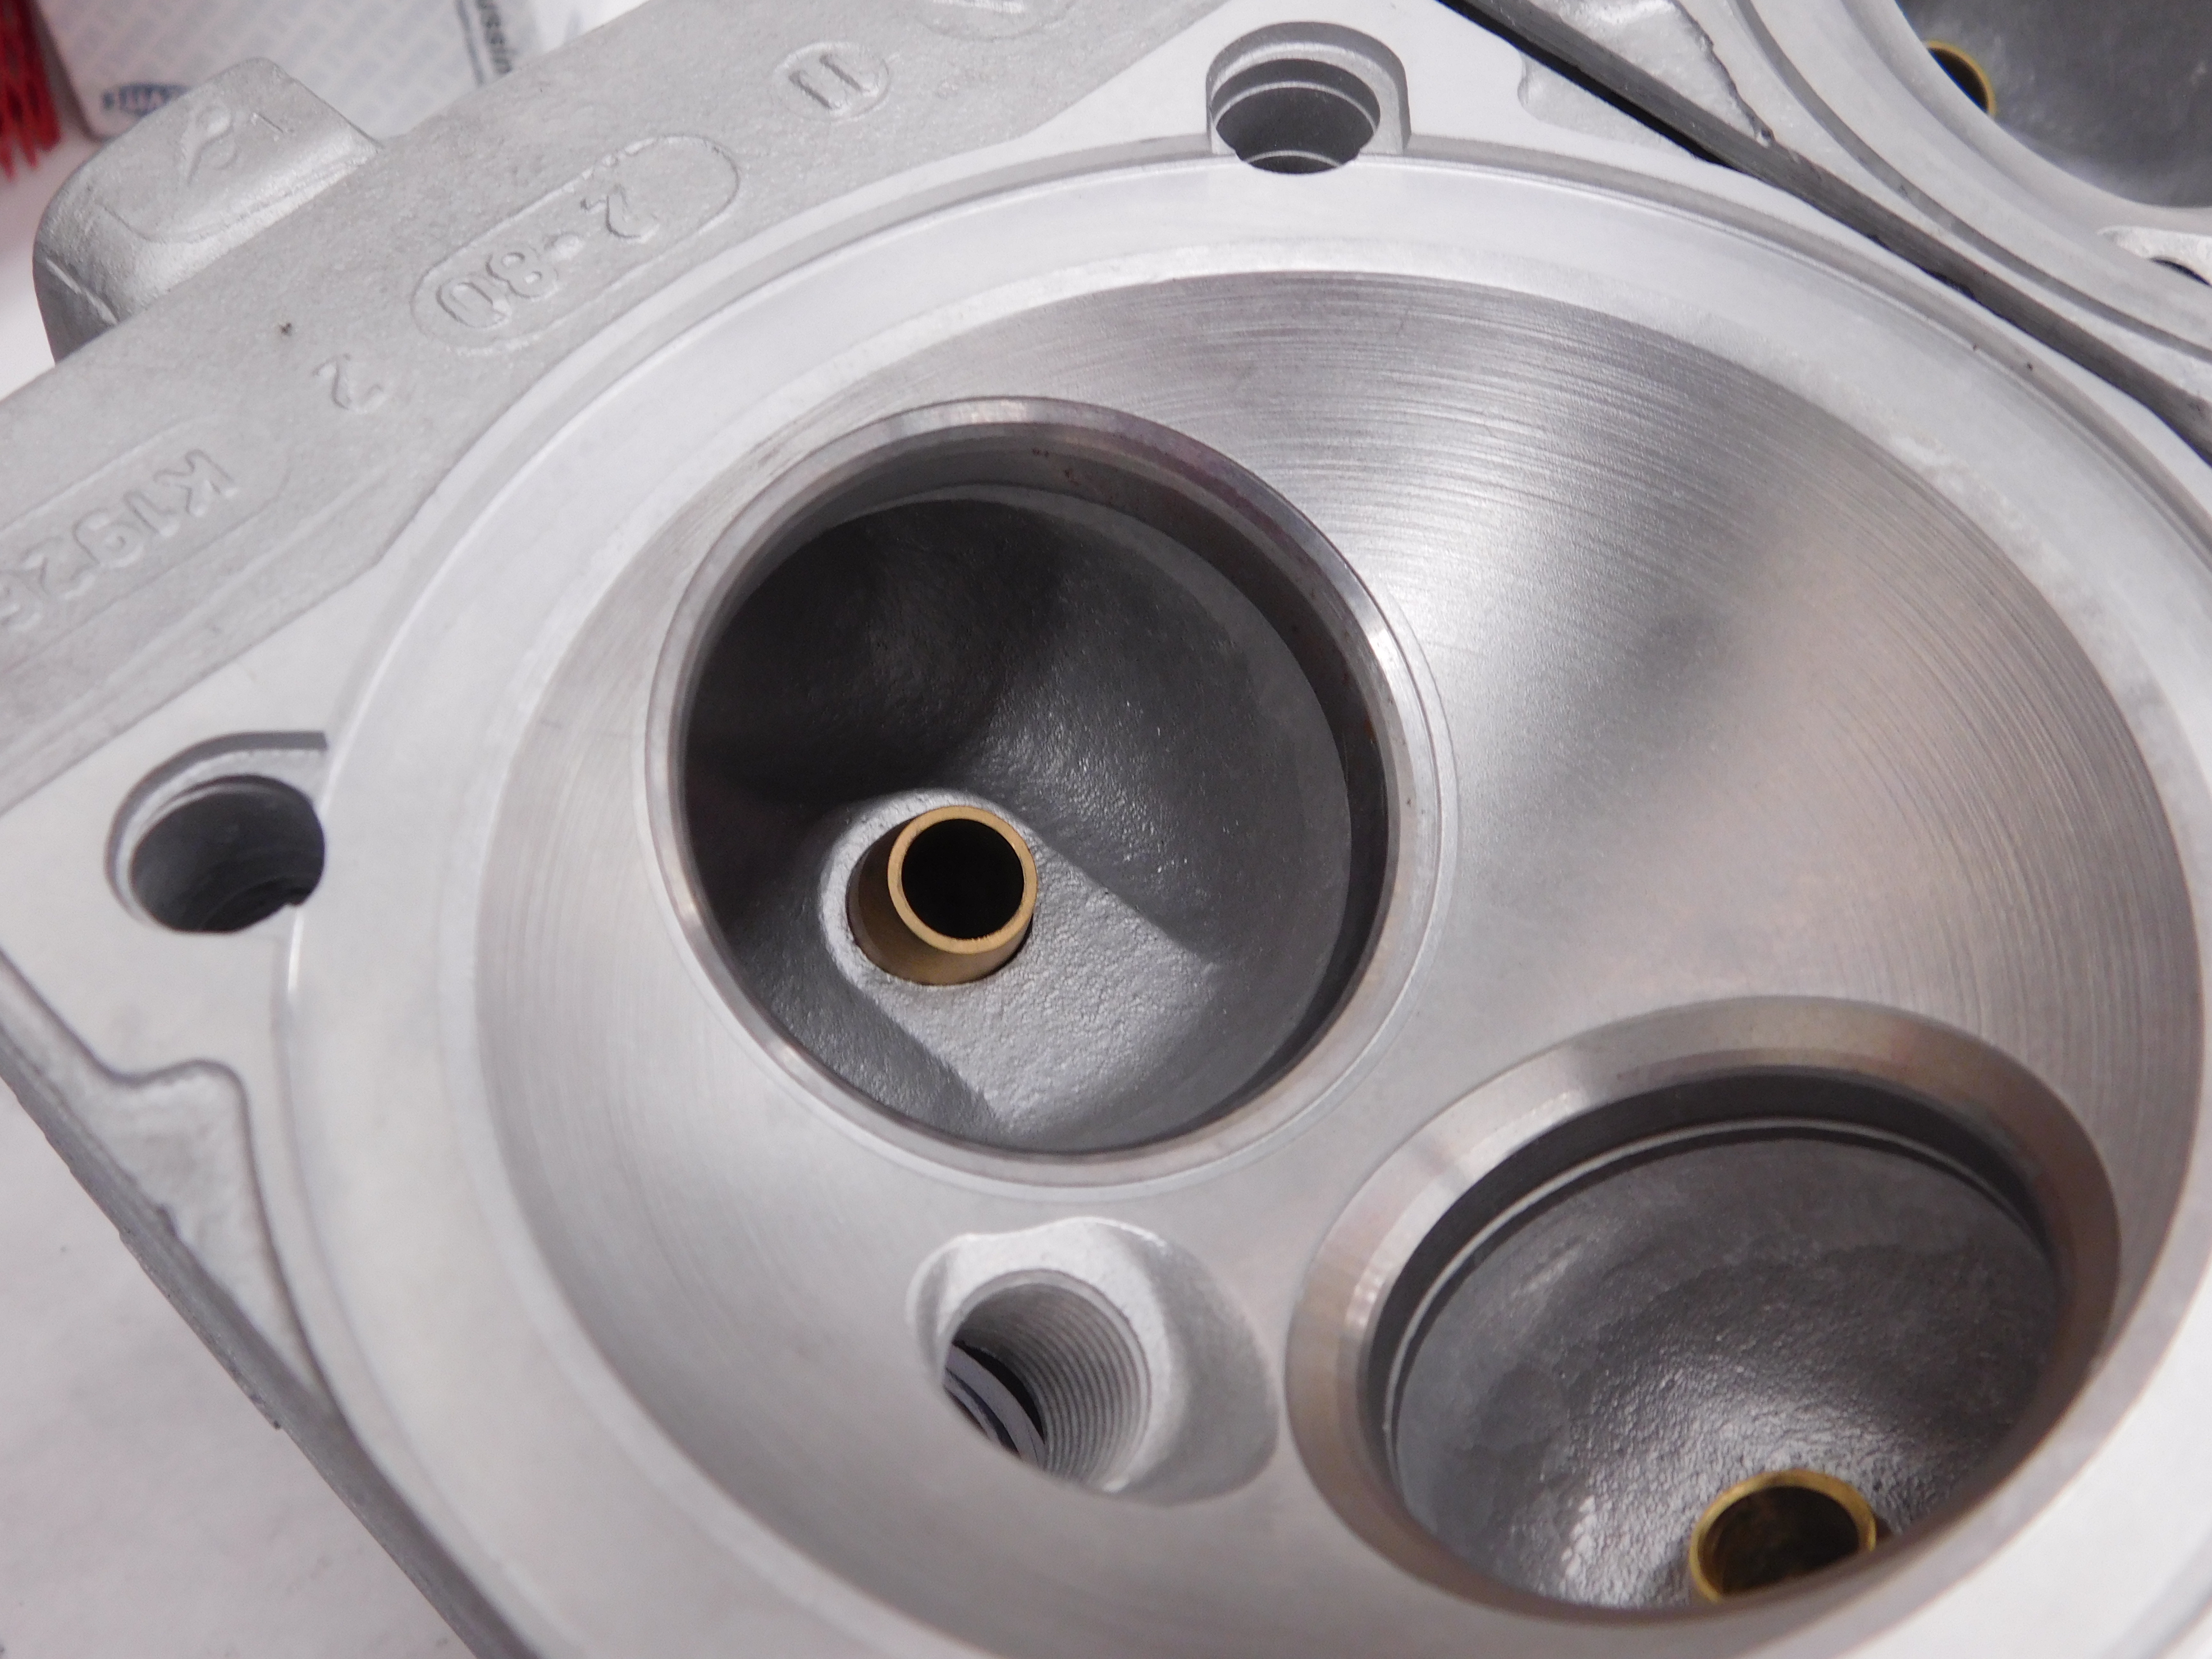
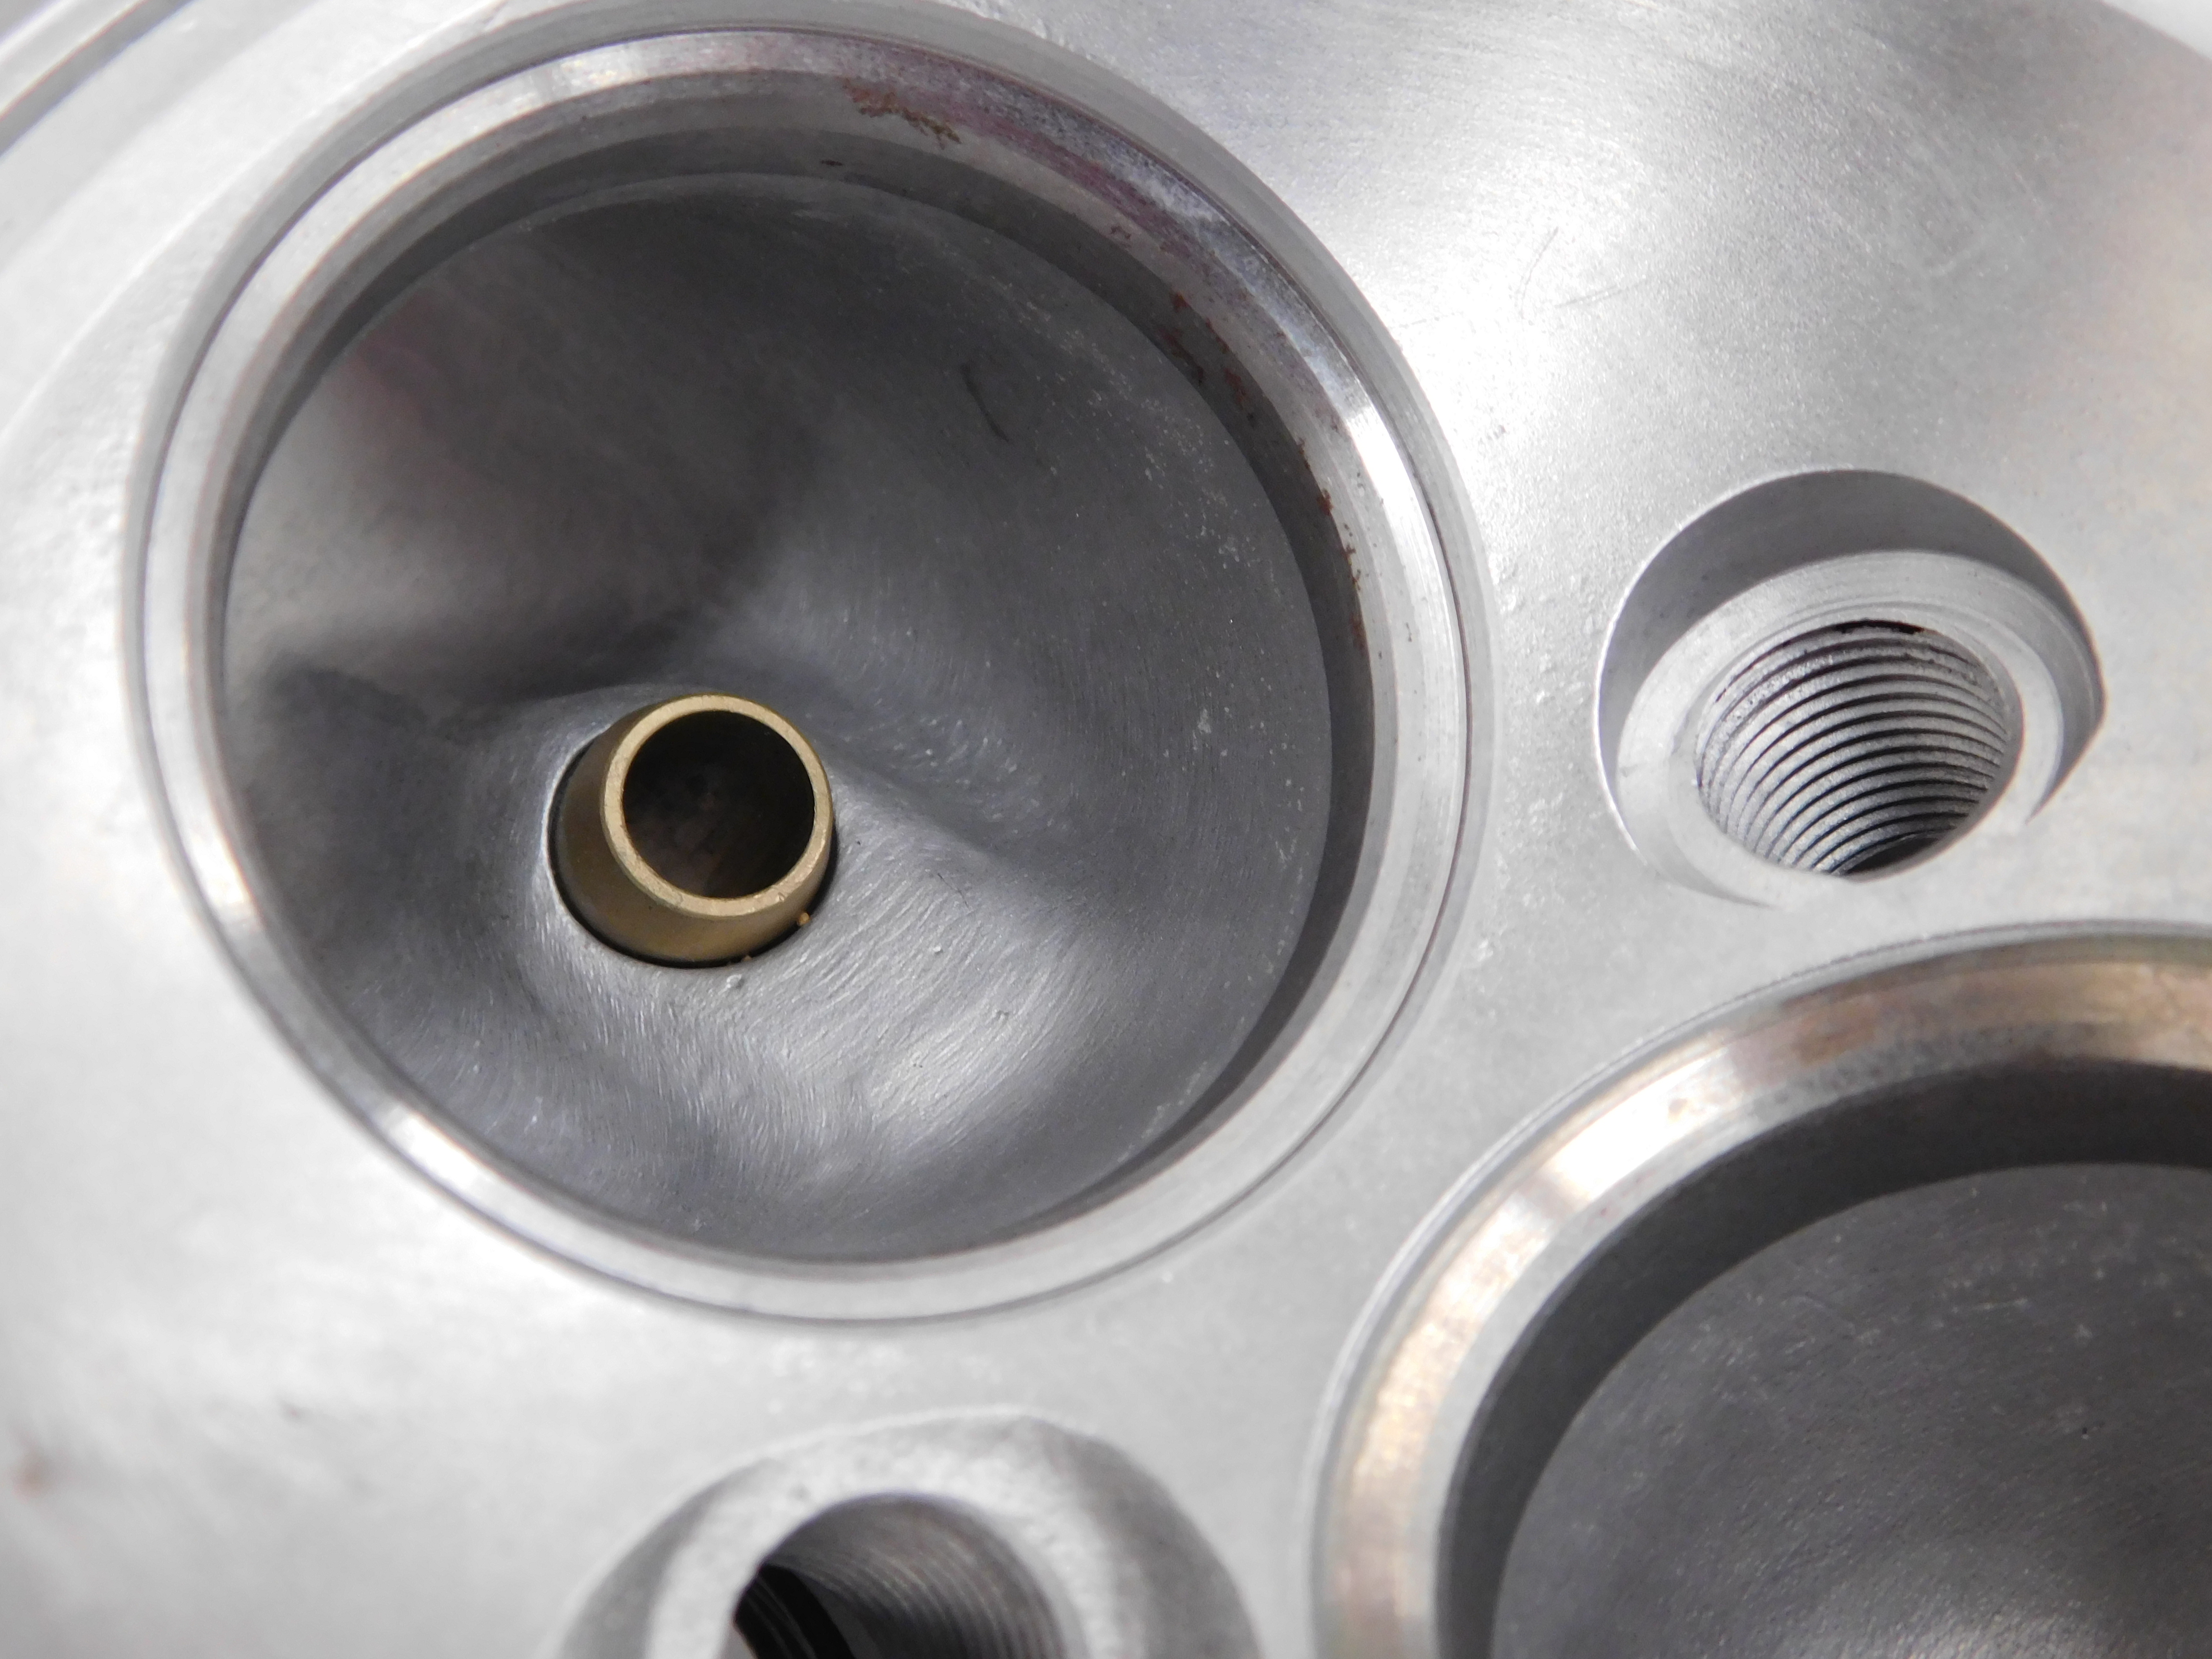
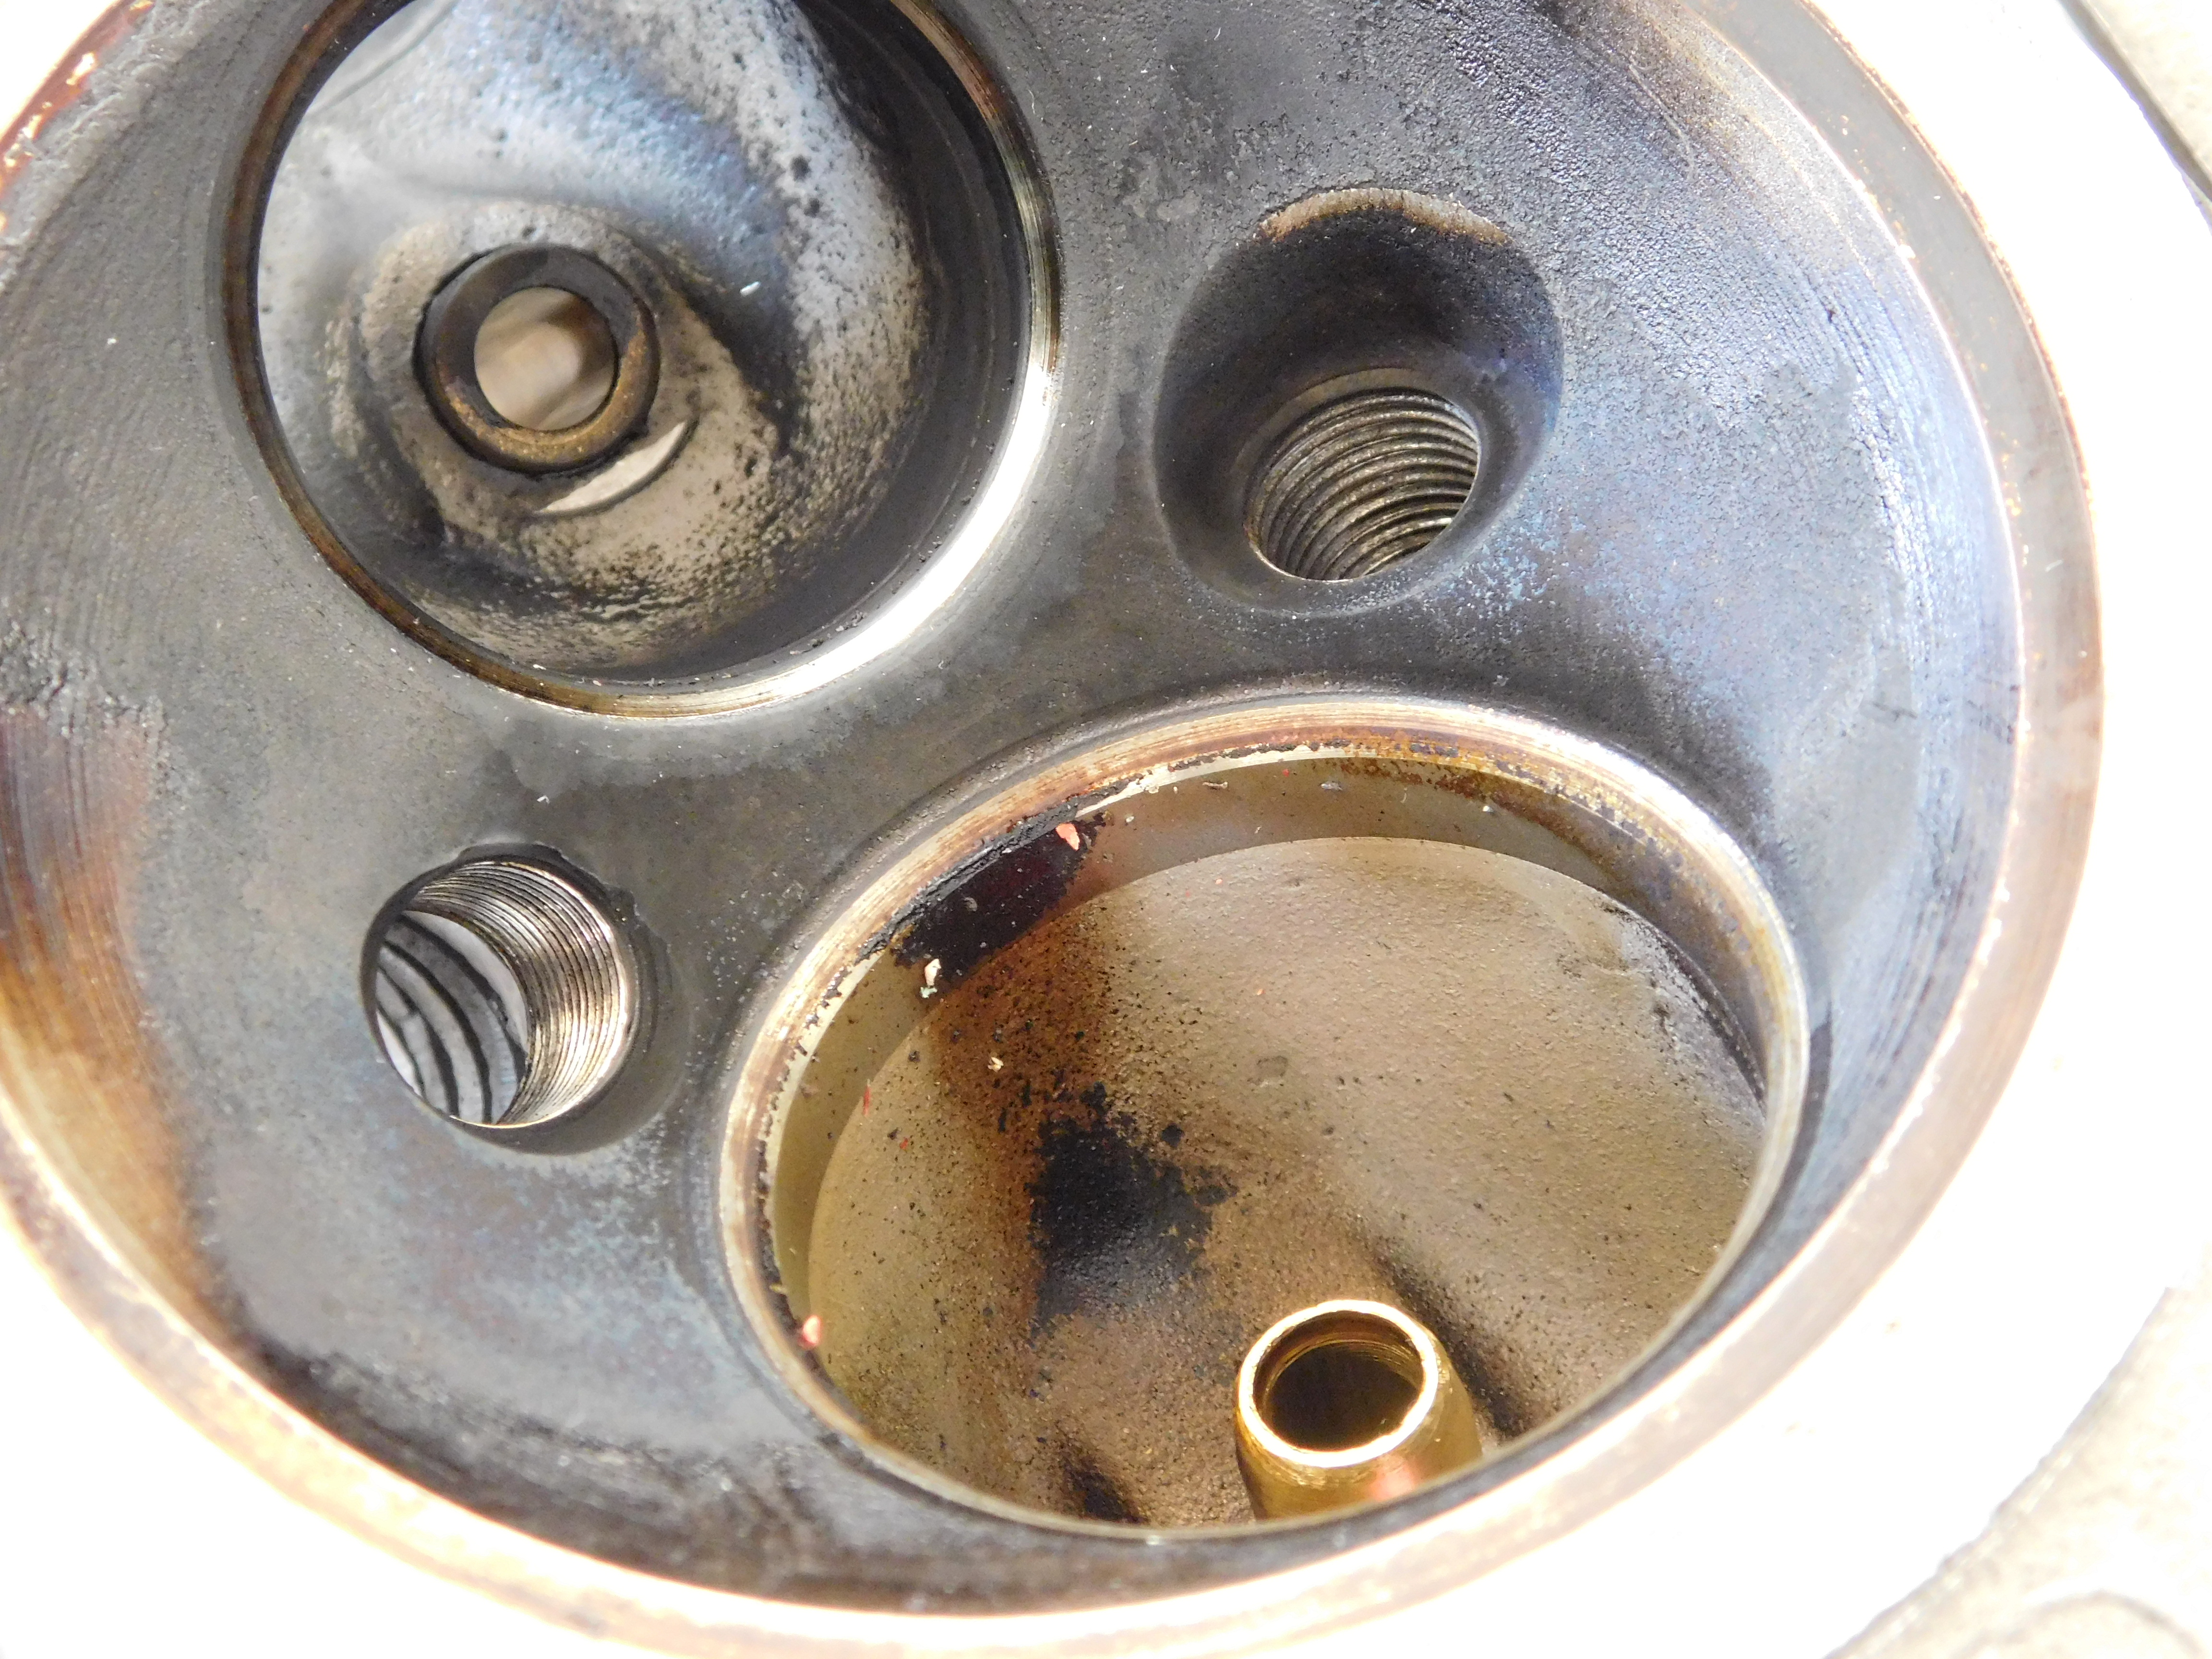
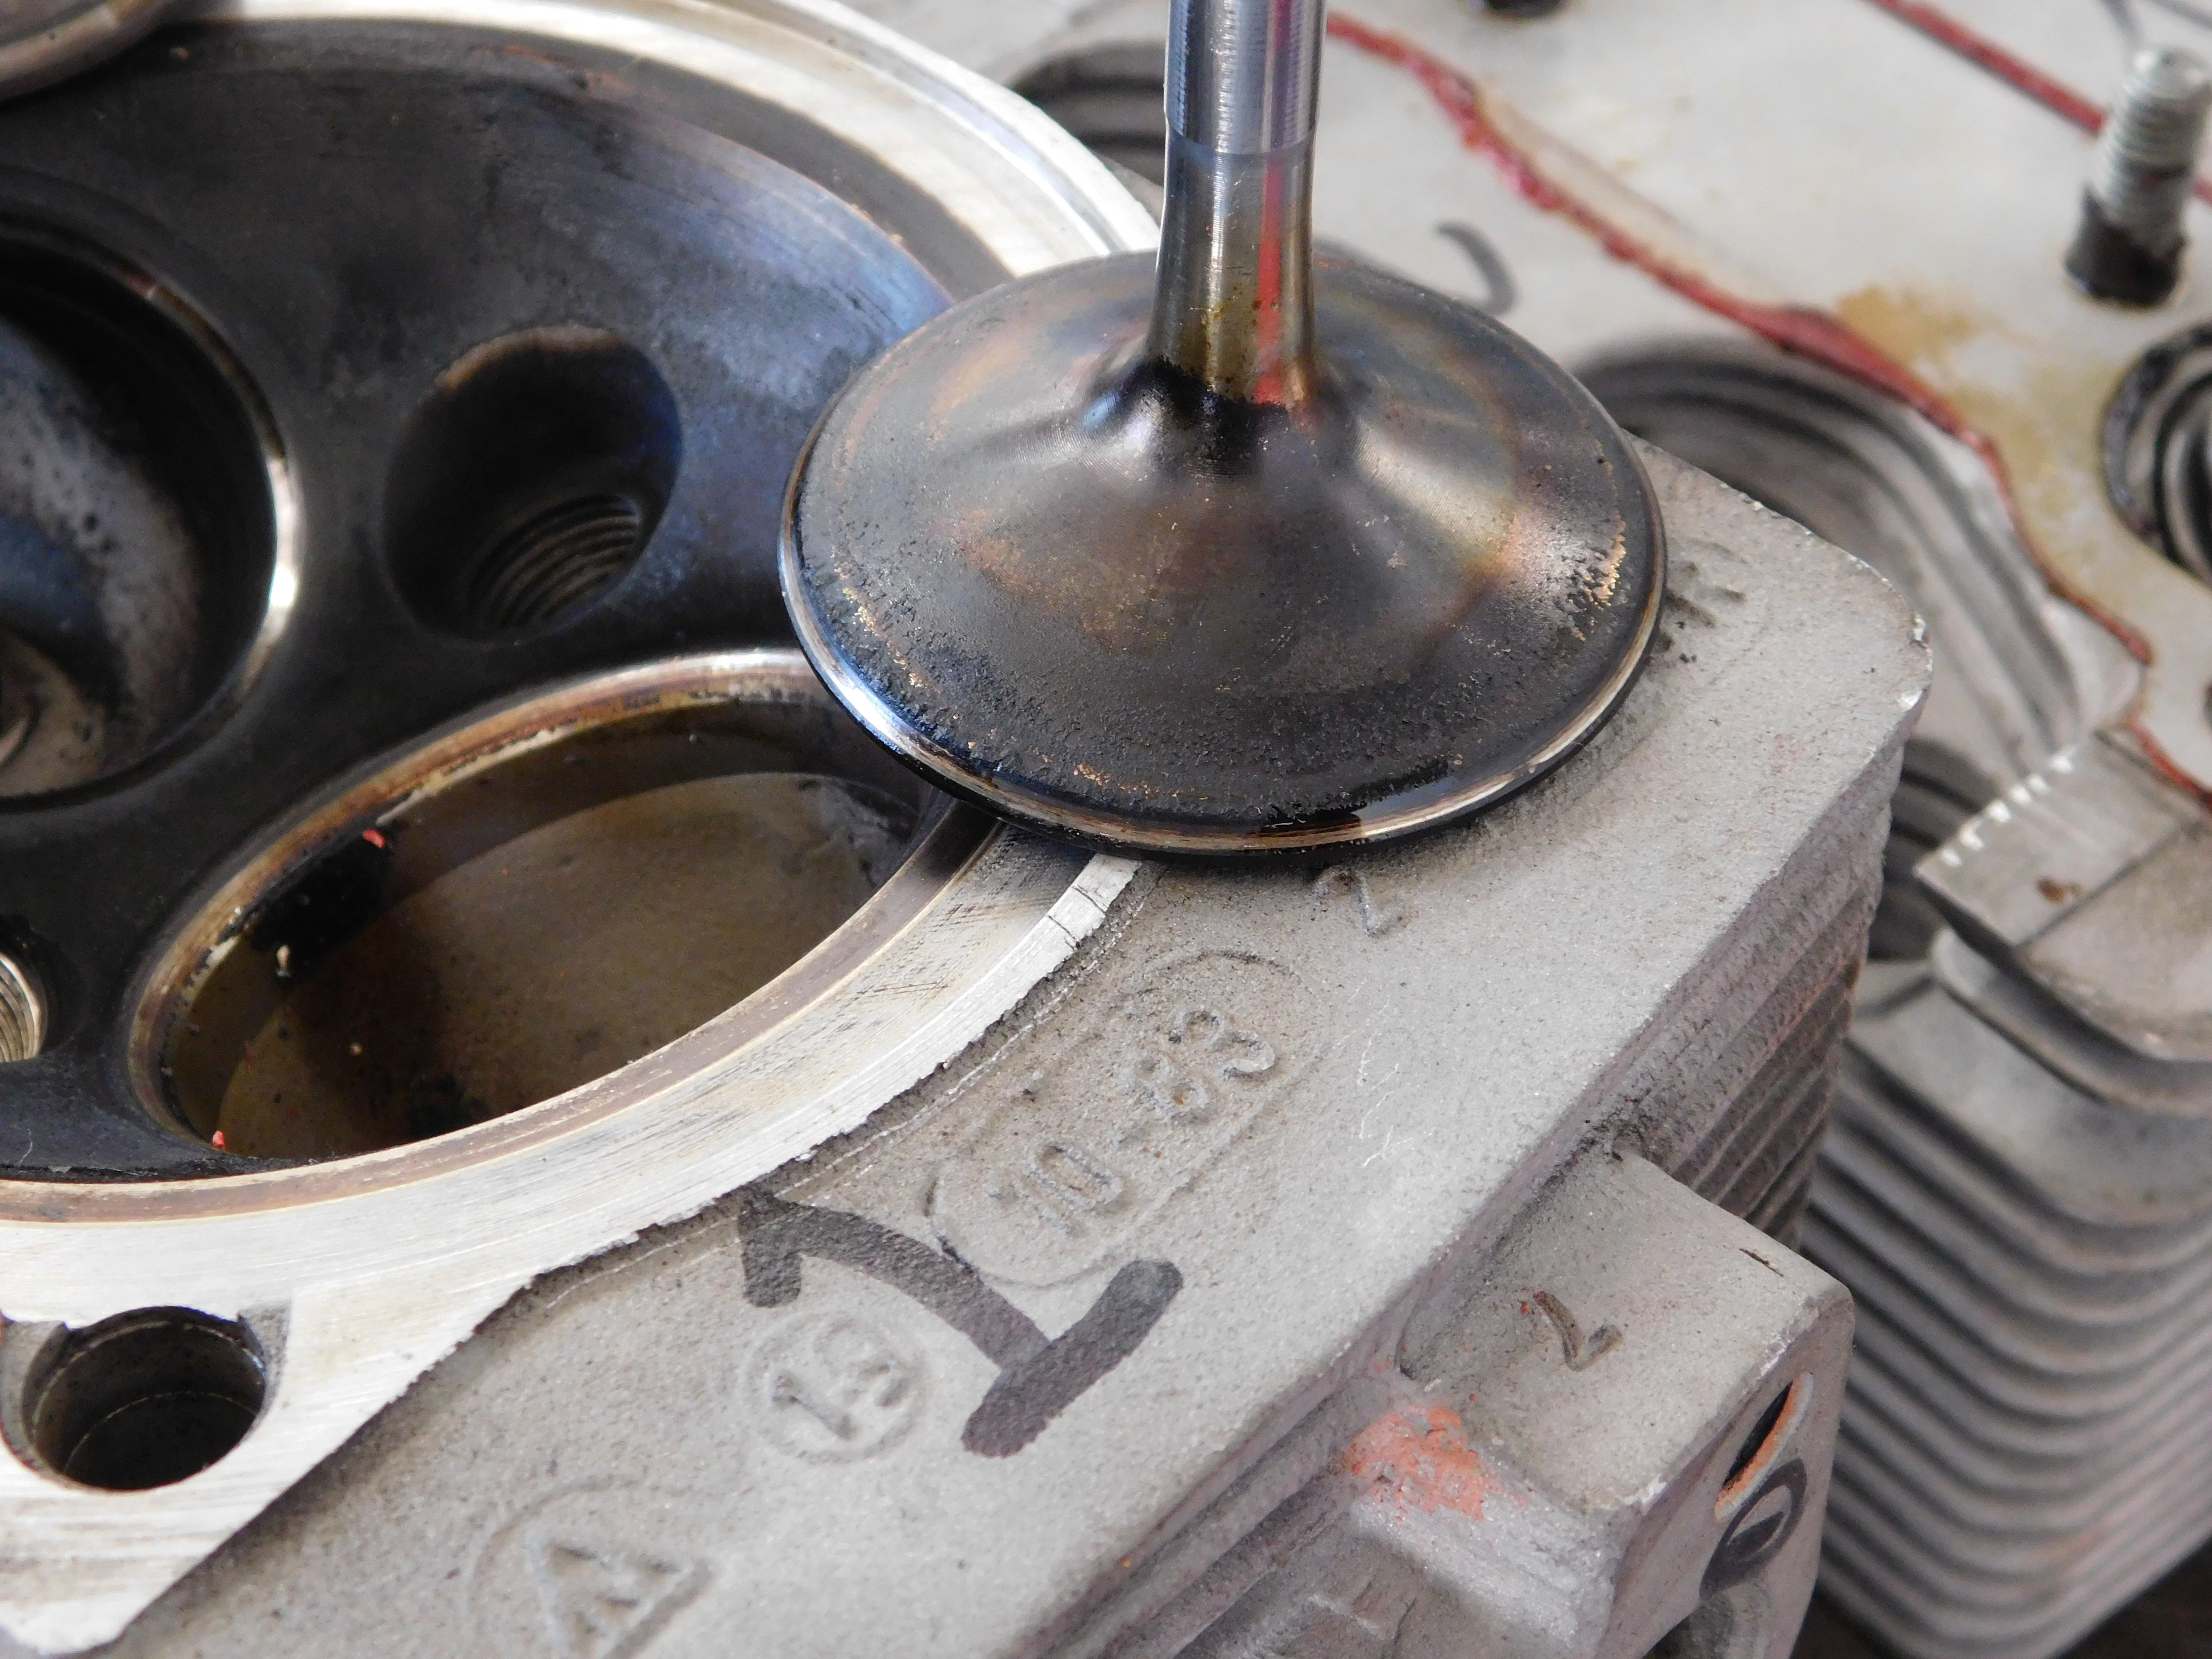
These images show two different heads with intake seats. One at the limit and the other sunk very deep. Also note the grain of grit or walnut shell stuck between the guide and the guide boss. Therefore, soda is the best abrasive to use when cleaning heads.
If the guides and or the seats need replacing, the guide work is started first. The heads are fixtured up on special tooling and the guides are core drilled to 7/8 from being out. This removes a lot of the interference and requires very little effort to remove the guide. The heads are heated in an oven and the guides are pressed out so we do not damage the guide boss part of the cylinder head. The guide boss bores are measured to the correct interference fit to the guide is maintained. The guide OD ‘s are measured for this same reason. The heads are re heated in the oven, the guides frozen in liquid nitrogen and installed into the heads at the correct heights. Installing the guides this way helps keep the concentricity to the existing valve seats better. One of the difficult parts of rebuilding heads is keep the guide concentric to the valve seat. Once the heads have cooled, the guides are honed on another machine with diamond pilots to obtain the correct valve stem to guide clearances. We do not ream the guides as this can cause poor surface finish and have a determent of the oil film that is required between the guide and the valve stem.
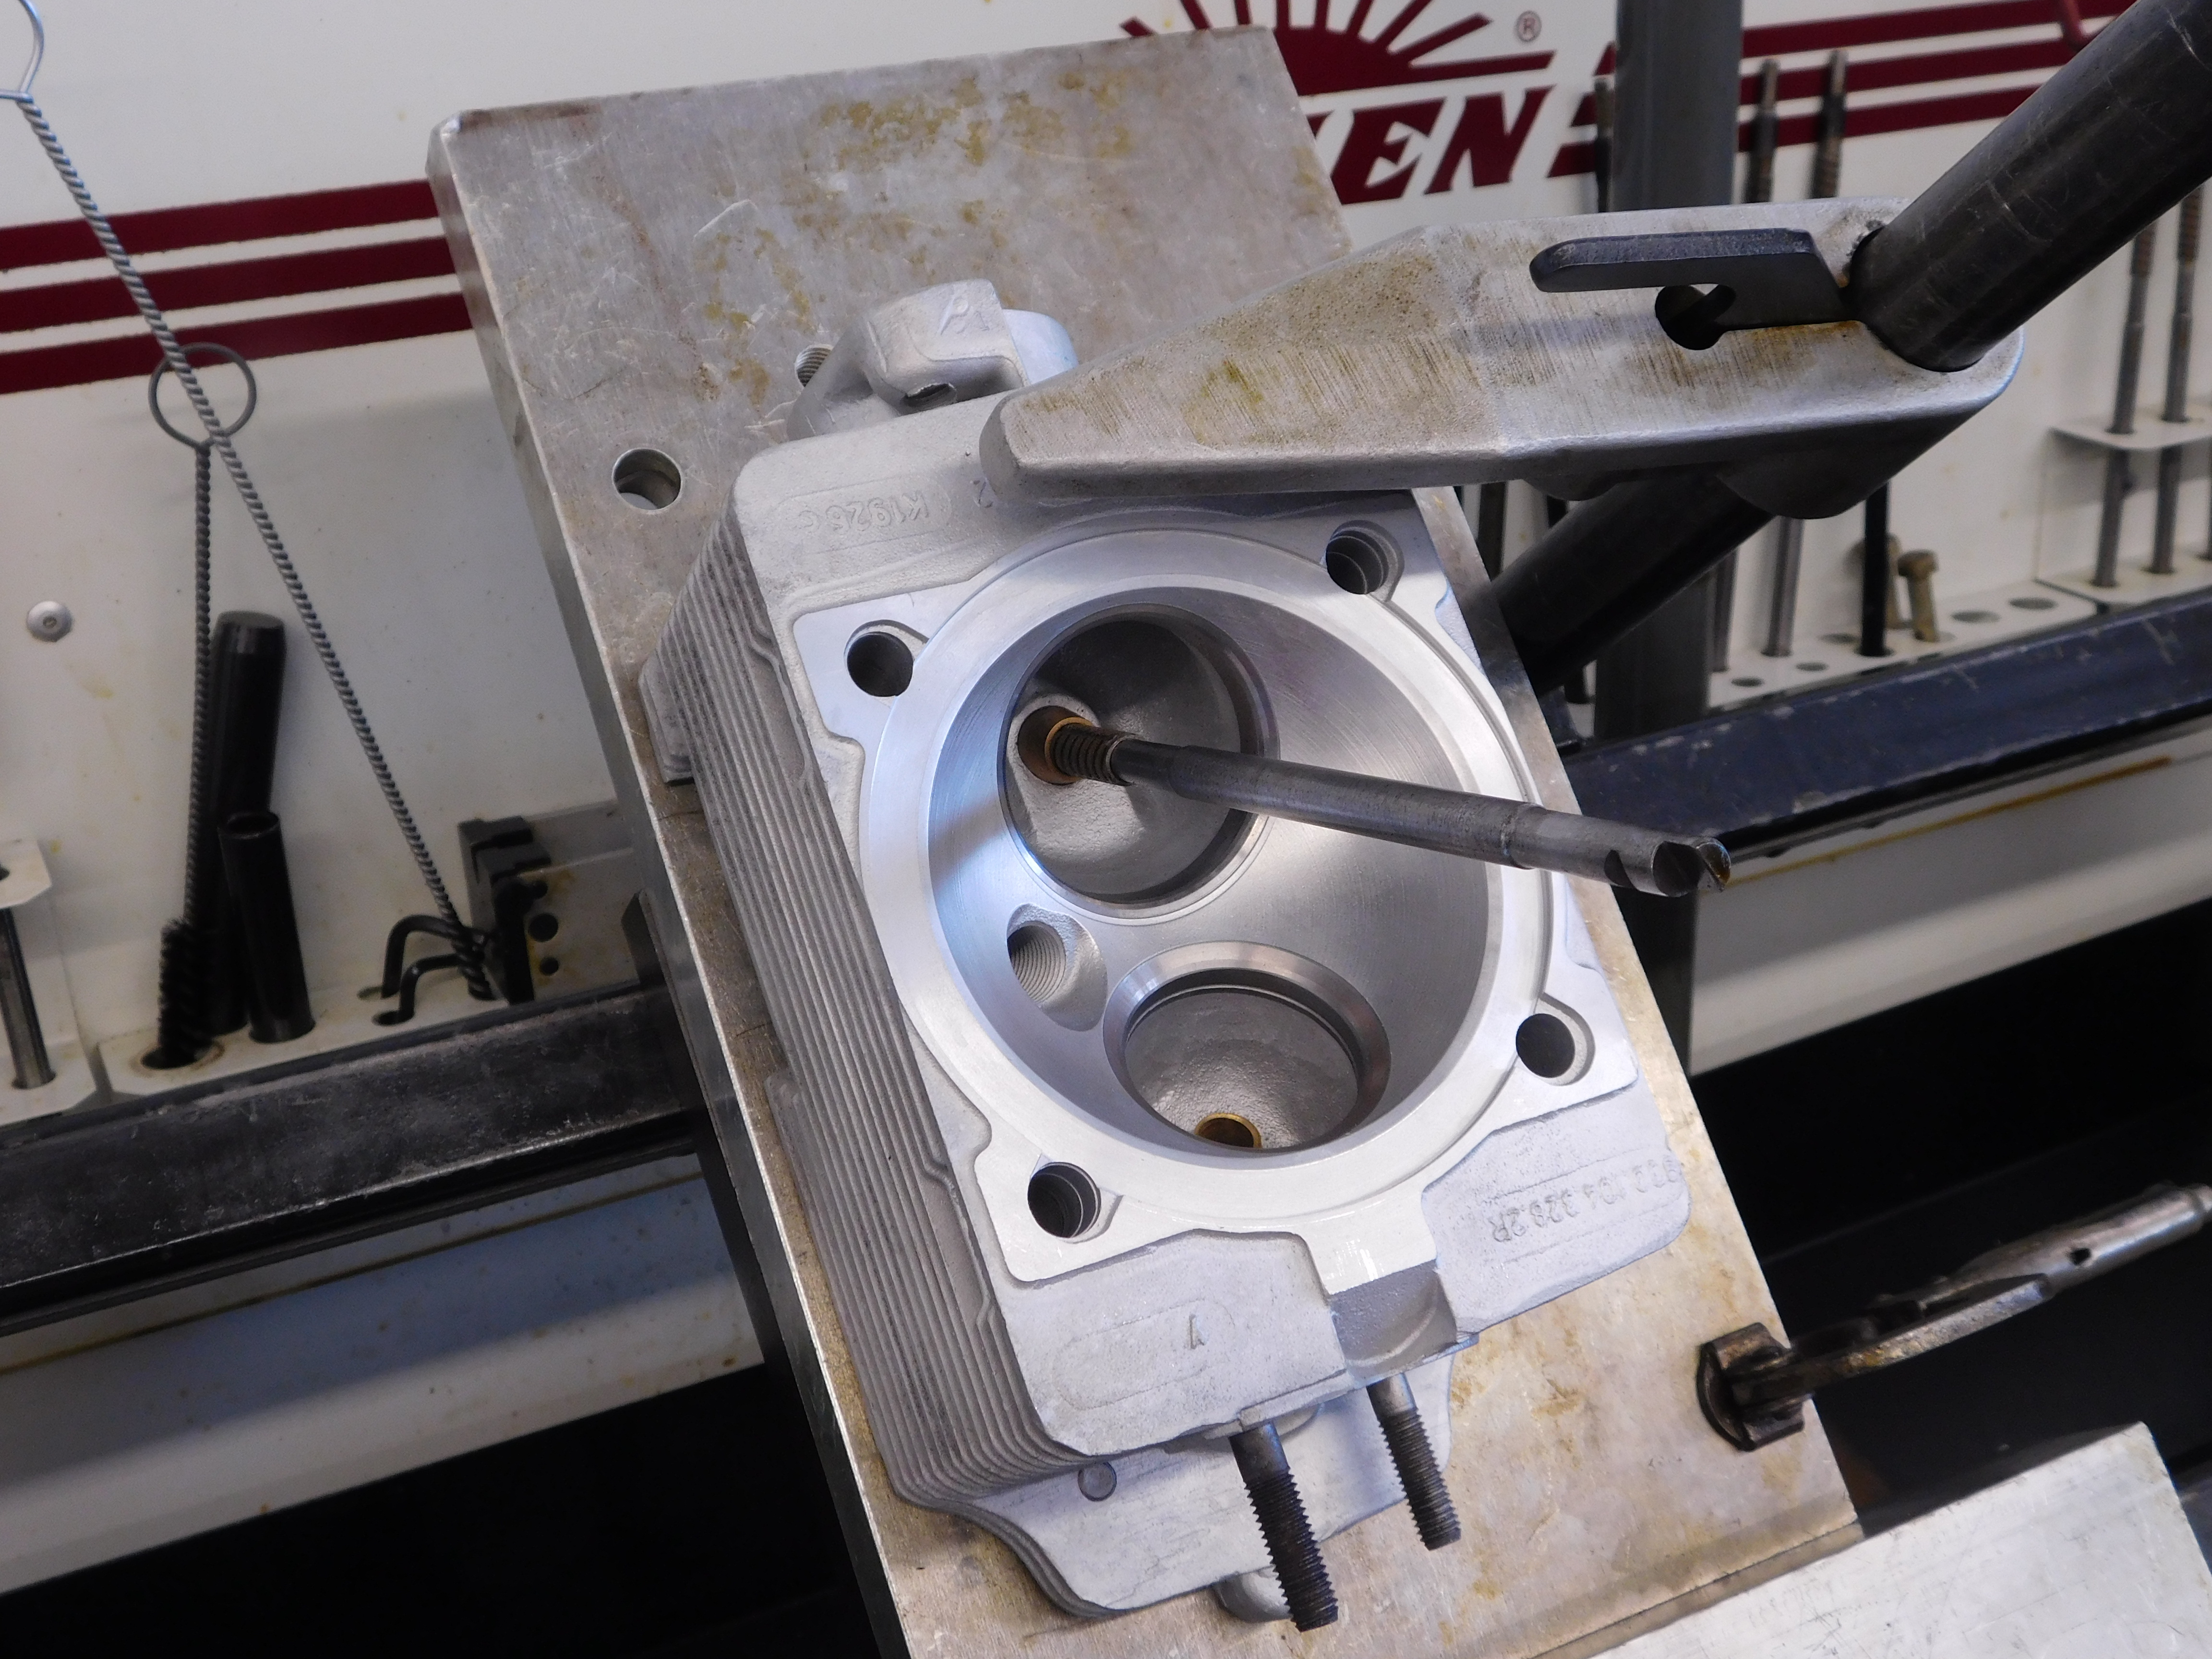
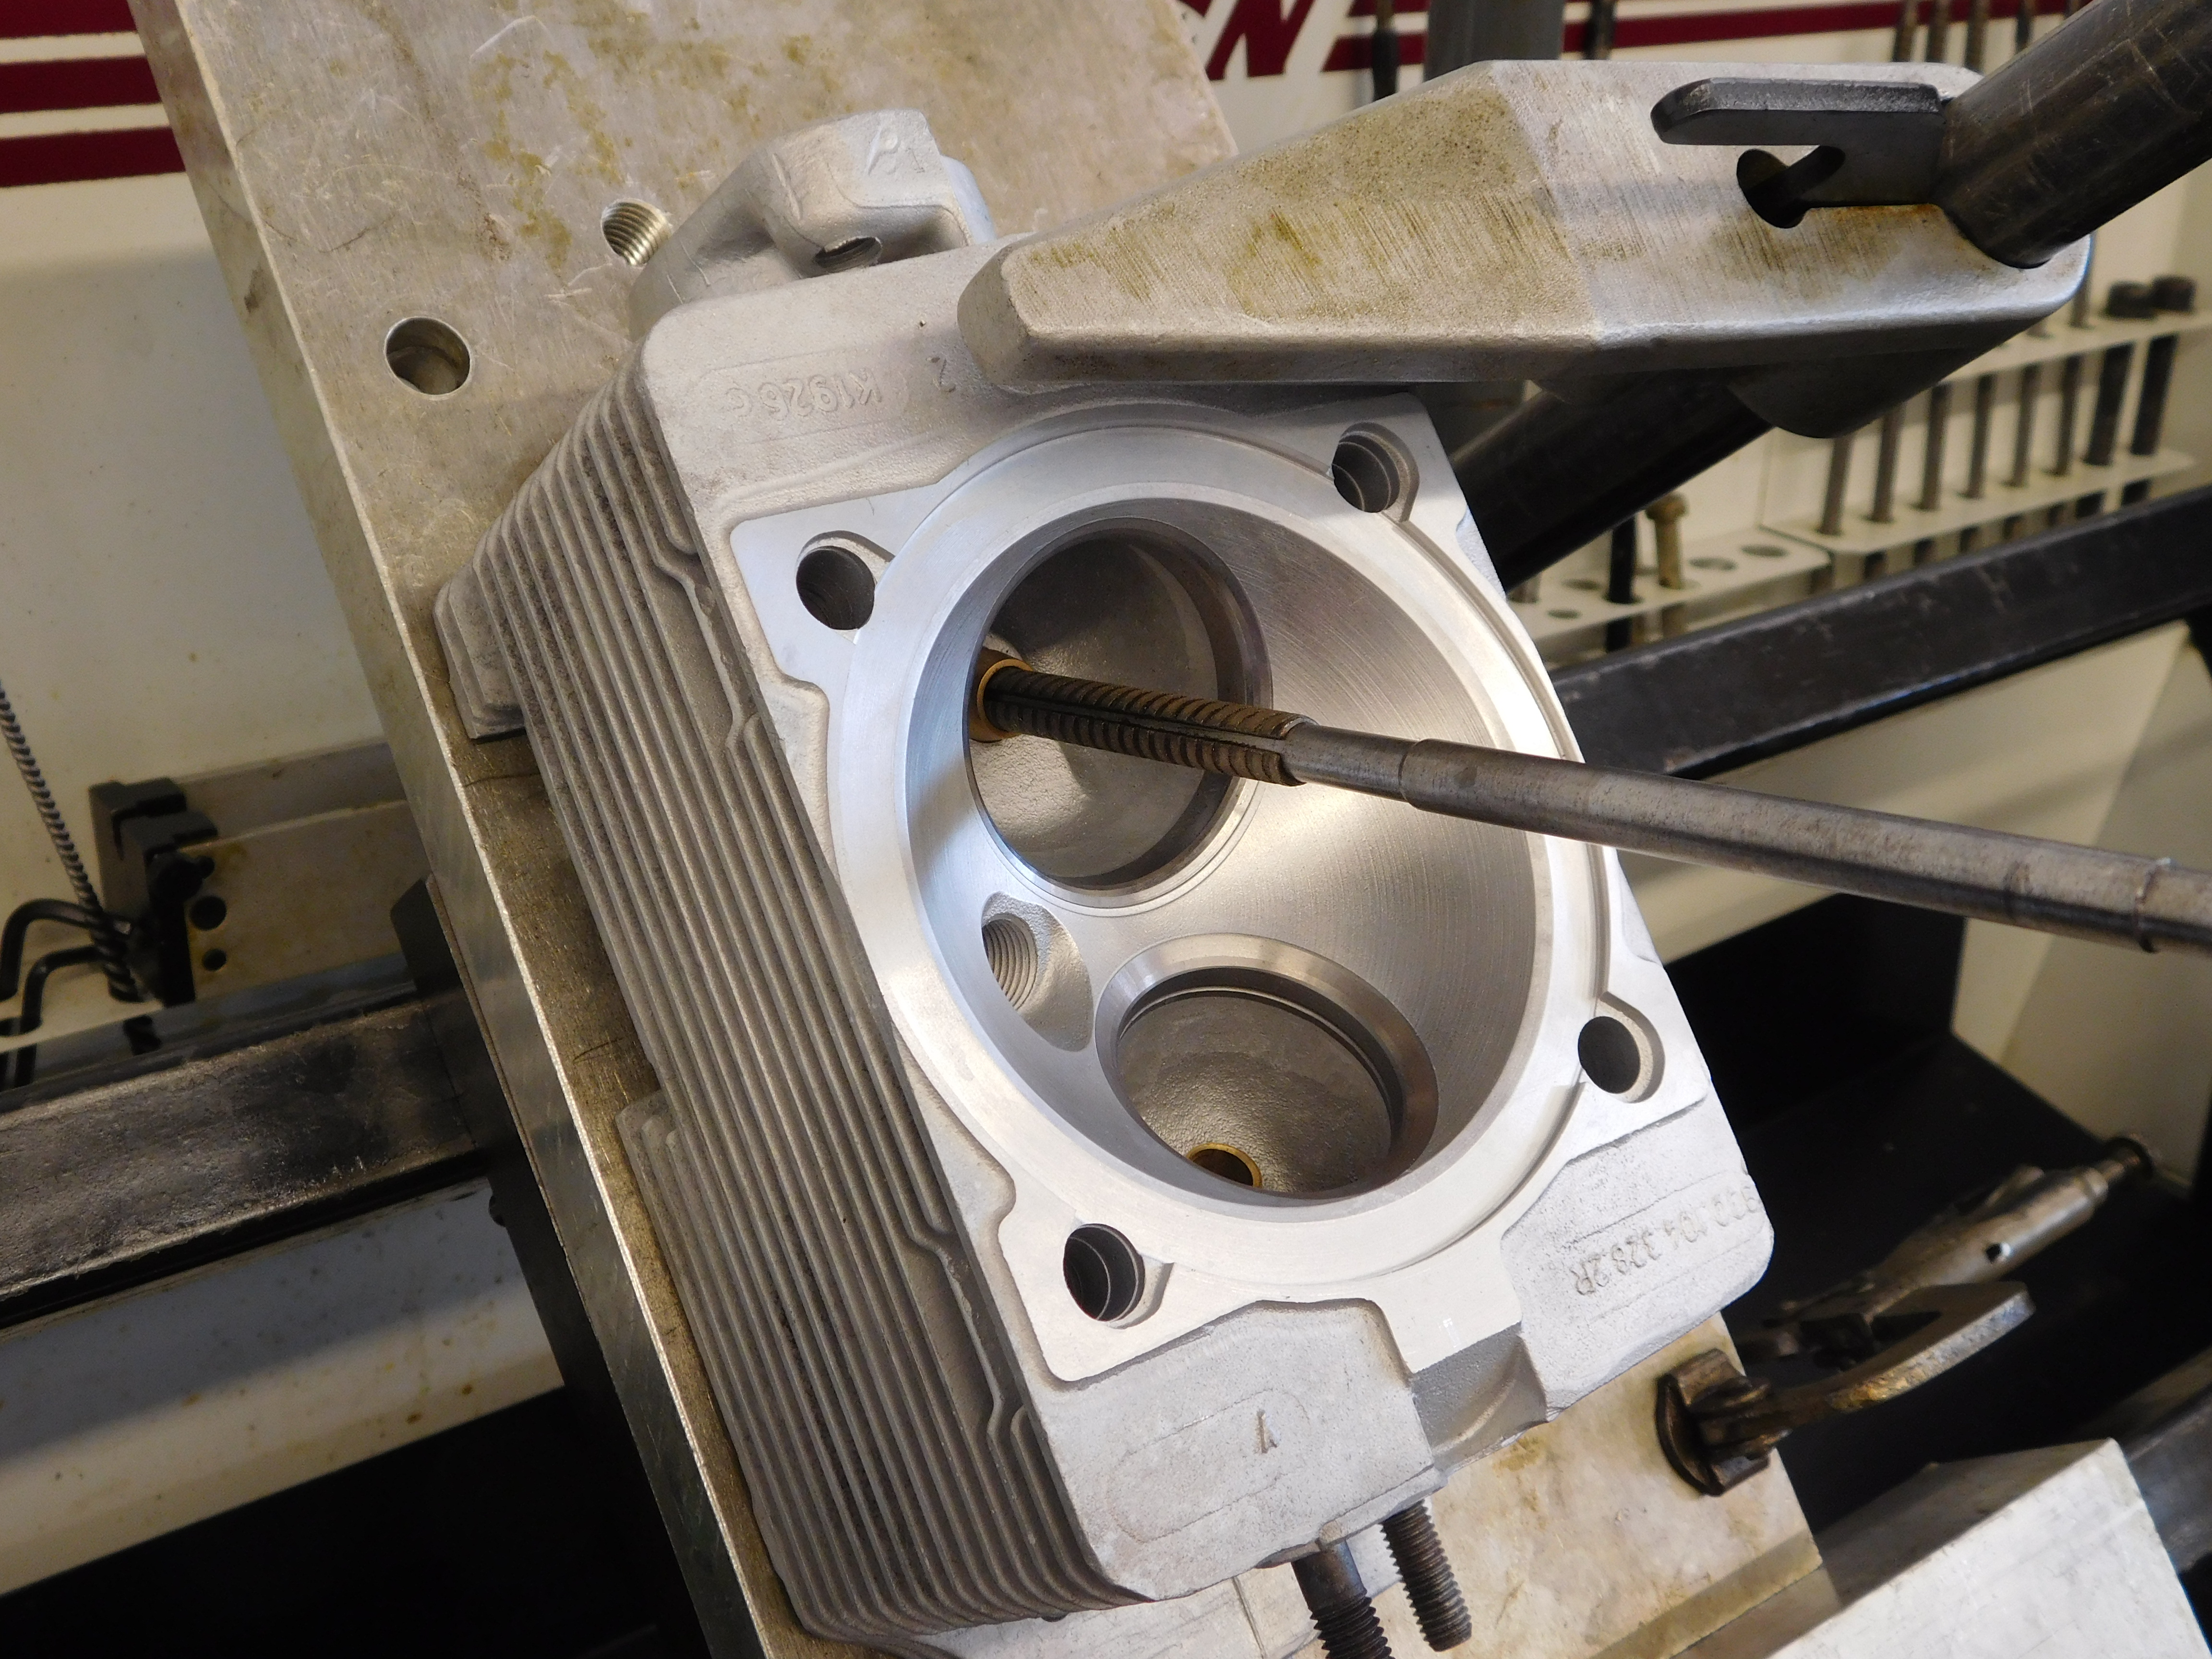
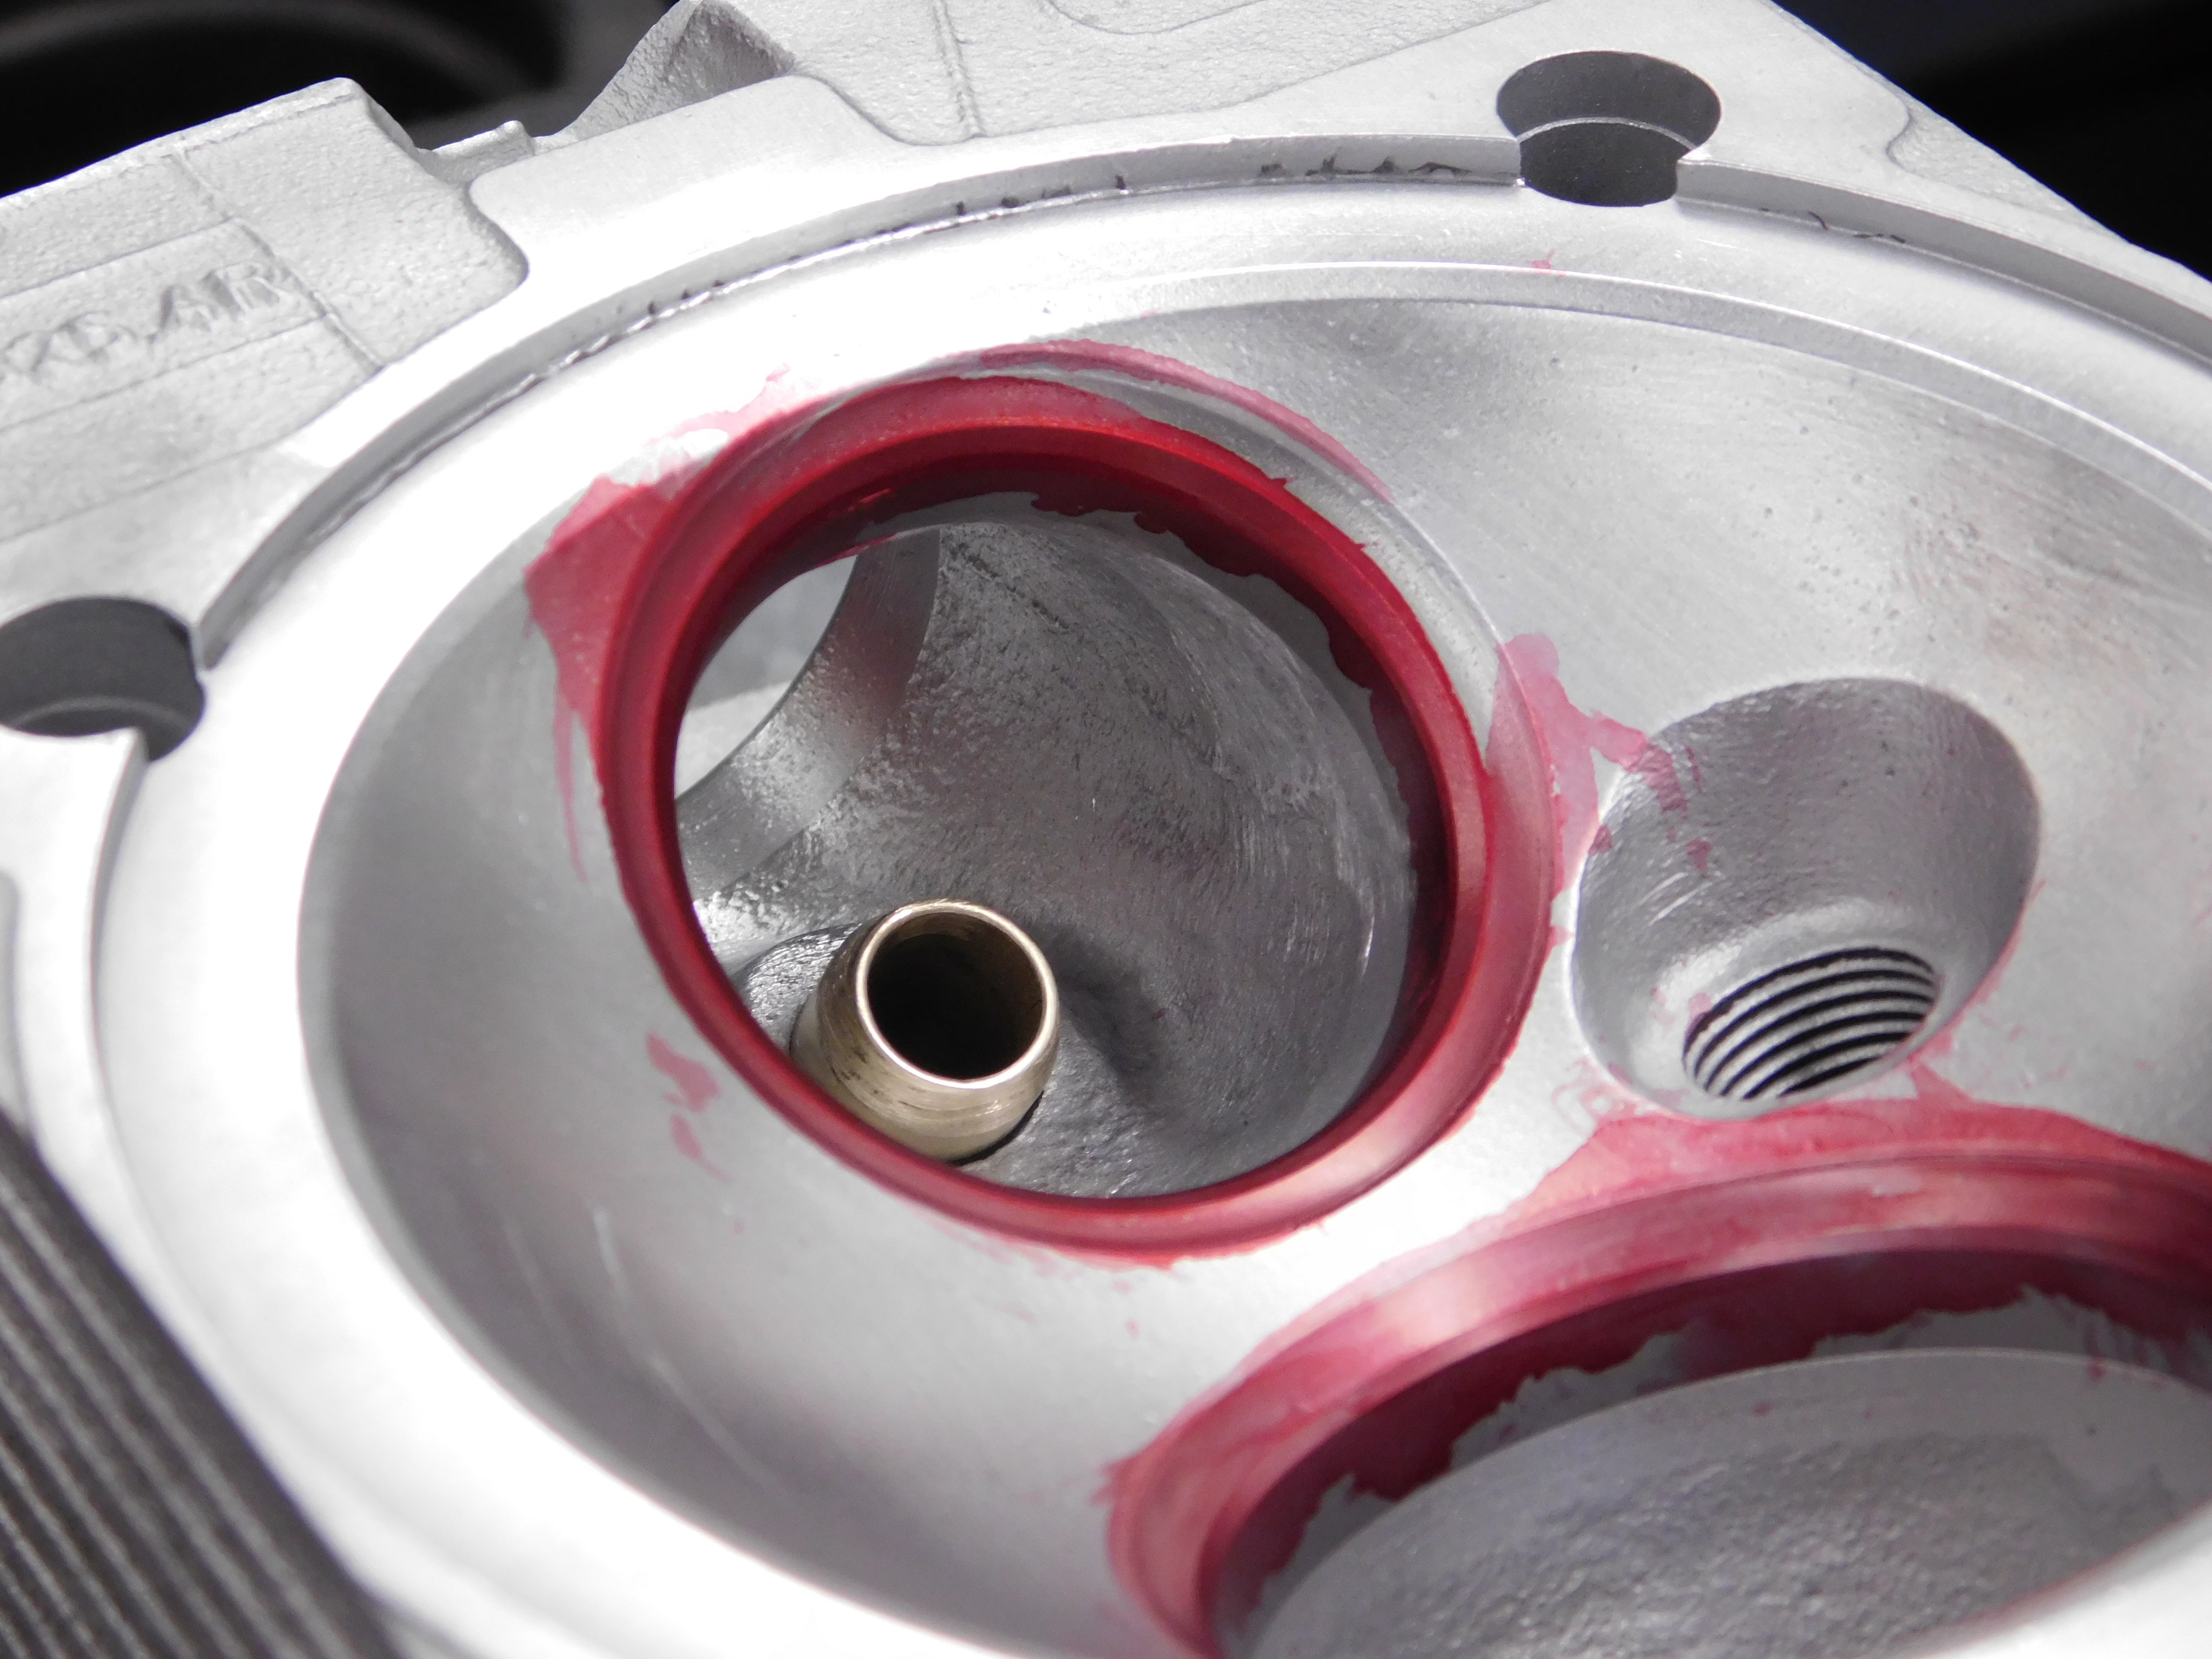
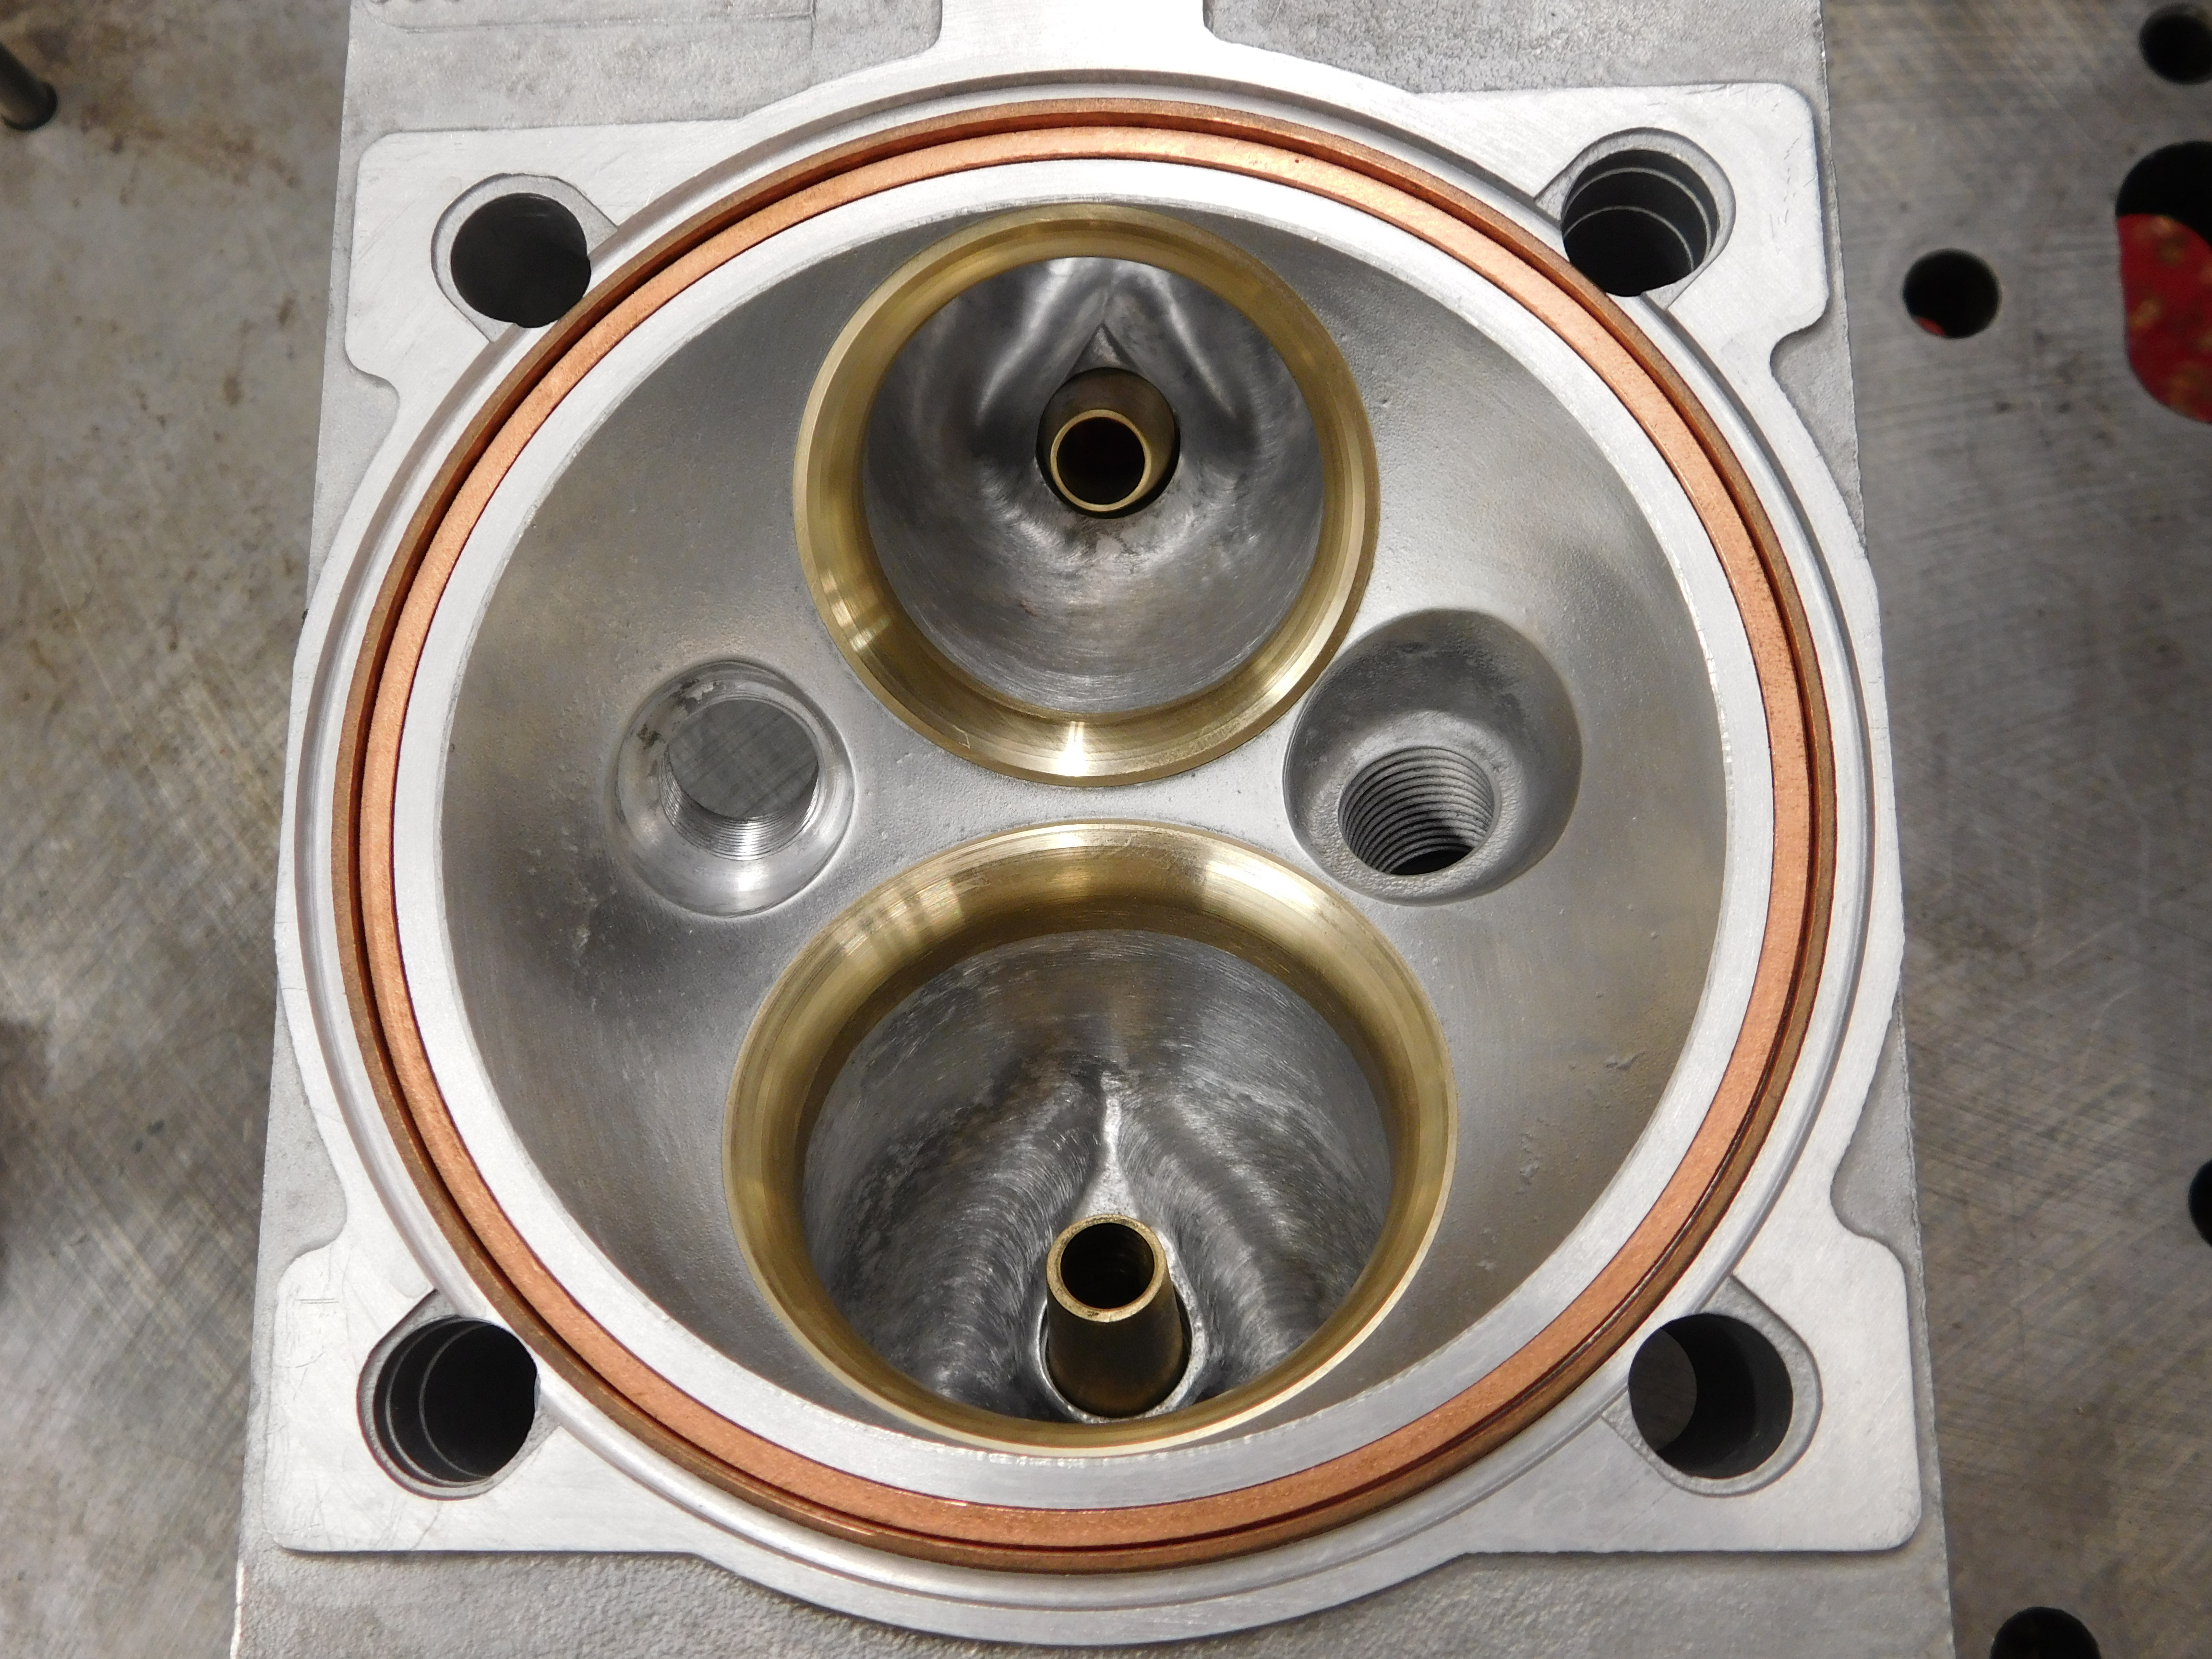
If the seats need to be replaced this is the next process. The heads are re fixtured up on special tooling and the seat inserts cut out. Once the insert is removed we just kiss the housing bore to make sure the bore is concentric to the new guide. The heads go through a similar process when installing the new seat inserts as they do when installing the guides. The bore ID’s are measured, the seat insert OD’s measured and the correct interference calculated. Heads are then oven heated and the seats frozen in nitrogen, shrunk, and installed without any force. The new seat inserts are tipped and throated, this is to match the top of the insert to the chamber and to match the throat of the insert to the port. The ports often require some hand polishing to get the inserts to match the ports exactly.


These images show the seat inserts removed, new inserts fitted and the new seats being cut.
Now the valves stems and valve heads are polished and the valve sealing faces dressed typically at a 45° angle. If any further back cuts are required, they are done now. The valve margins are checked now to make sure the valve margins are still thick enough for continued use.

We measure the head heights now so any adjustment required on seat heights can be done. When cutting the seats angles we measure off the head face where it seals to the cylinder. This ensures the seats are all at the same height. If the head heights differ, this can change the seat heights. The seat angles and widths are now cut and each valve fitted to its seat and the seal vacuum tested. Once we have all valves sealing to -0.7b typically the valve stem heights are checked. This ensures the rocker arm geometry is correct. The valve stem tips are dressed now and the valve lengths all made the same. Sometimes minor adjustments can be made to obtain the measure height the stem tip is from the cylinder head.
We now fit what we call chamber valves and polish the chambers. This removes any sharp edges and inclusions that may have happened in the heads previous service life.
Now we remeasure the head heights and machine the heads to the same heights. Any sealing ring work is done now. Once the heads are machined we refit the valves and measure each heads chamber volume. We do this so we can match the volumes and lower the chances of any detonation happening with off CR numbers in different chambers.
All the parts go through a final inspection and the list of required work re checked. Then the parts go through a final ultrasonic cleaning and oven dried.
The retainer heights are now measured, the valve springs measured for their rates, installed seat pressures, nose pressures and coil bind distance. We can now calculate the shimming required to obtain the same closed seat pressures on each valve. We calculate the pressures required both on the seat and over the nose for the application, cam used and RPM limit. By doing this we can usually lower the spring forces required, up to 30 lbs. on the seat. This is free horsepower lost when over springing the valves. Installed height made the same often have different seat pressures. This is why seat pressures are so critical. The seat face of the valve is the part that transmits the temperature out of the valve into the seat and out into the head for rejection. If you need more seat force, a wider seat 45°angle is usually required.


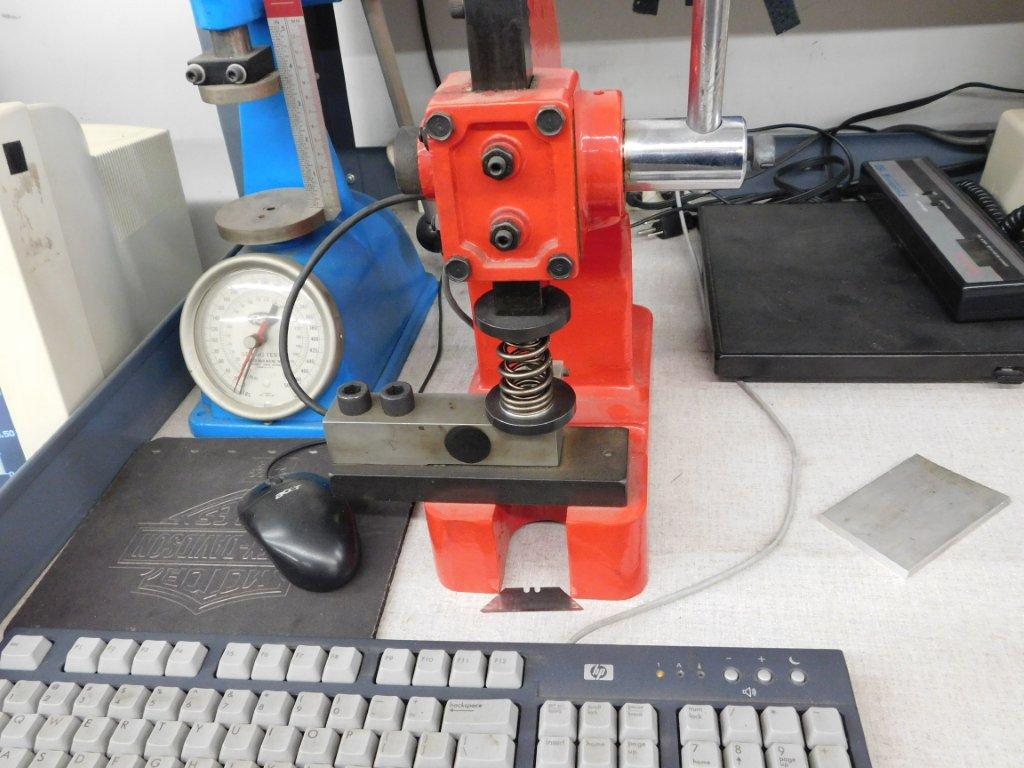
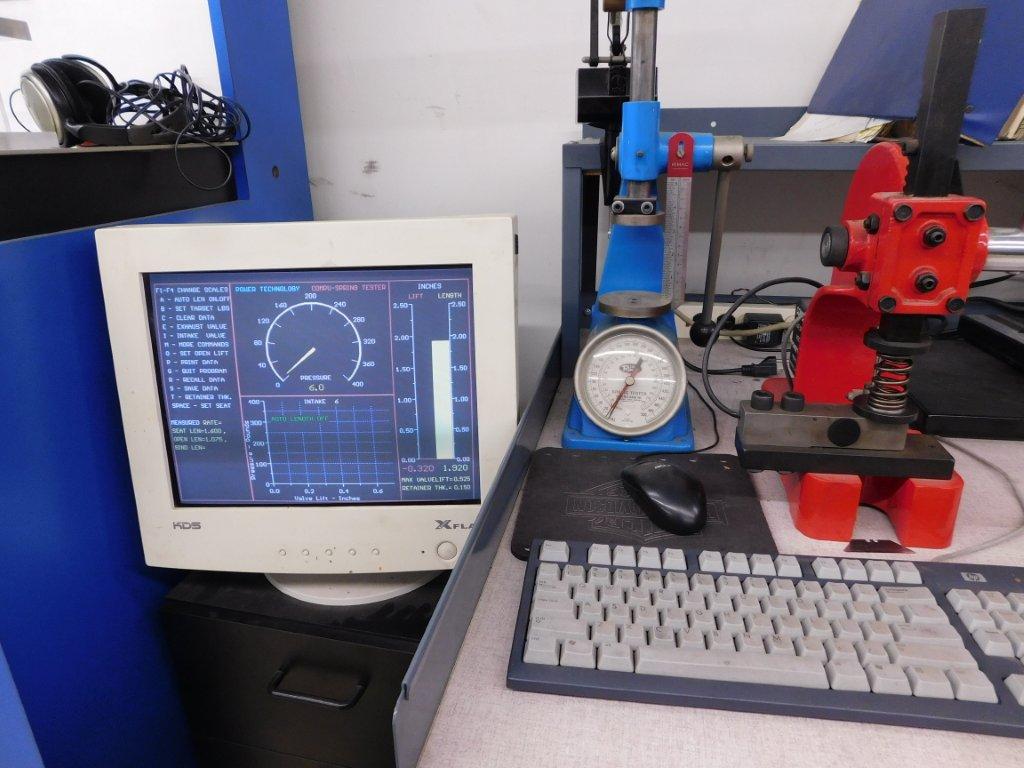
These images show the retainers heights being measured and the spring checked and the installed, nose and coil bind distances being calculated. Results are saved, printed and stored in the build folder.
The heads are now assembled with new seals and the correct number of base shims. Once assembled the heads are again vacuum tested to be sure we send out heads that seal and the final negative vacuum pressures recorded.
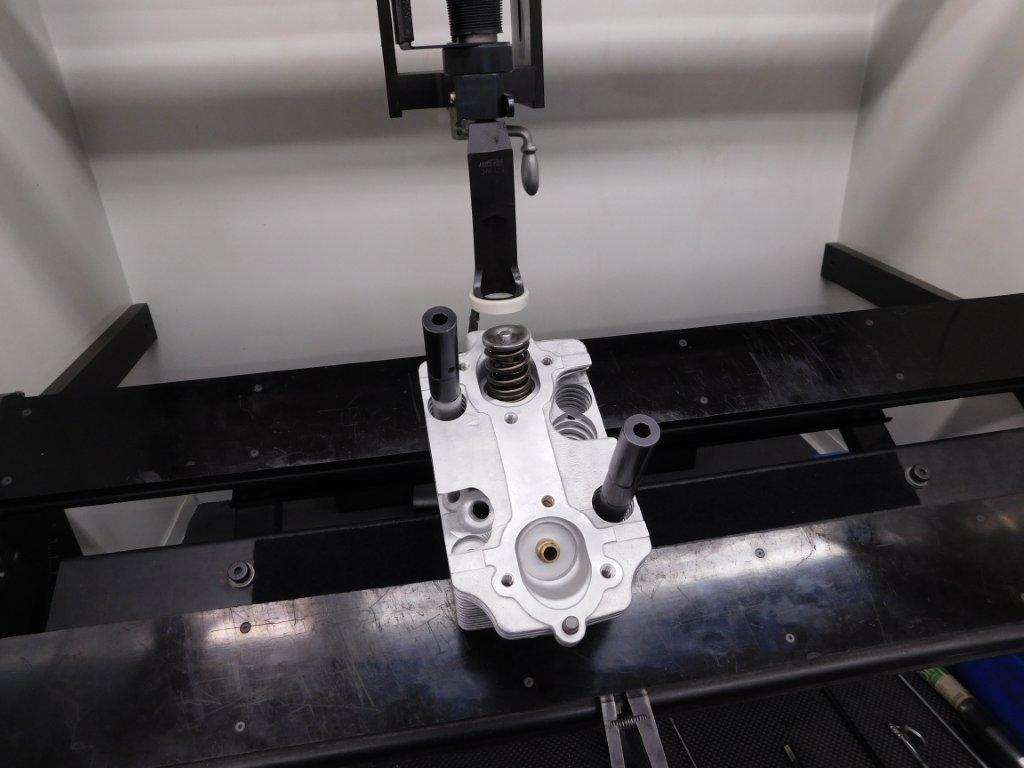
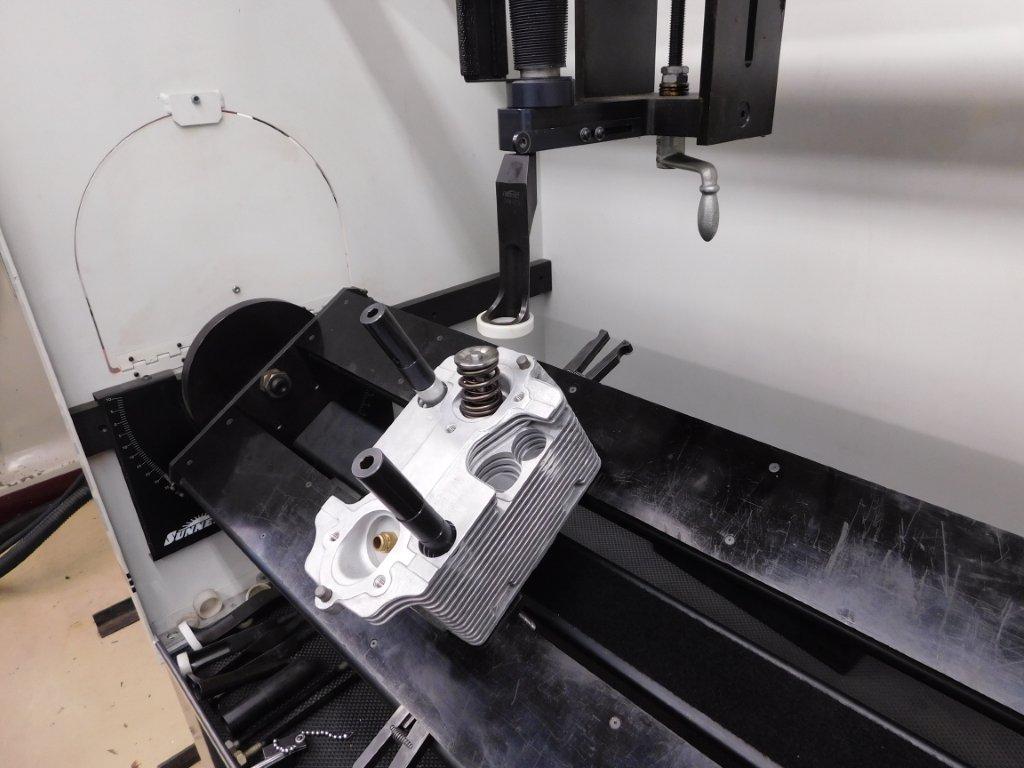
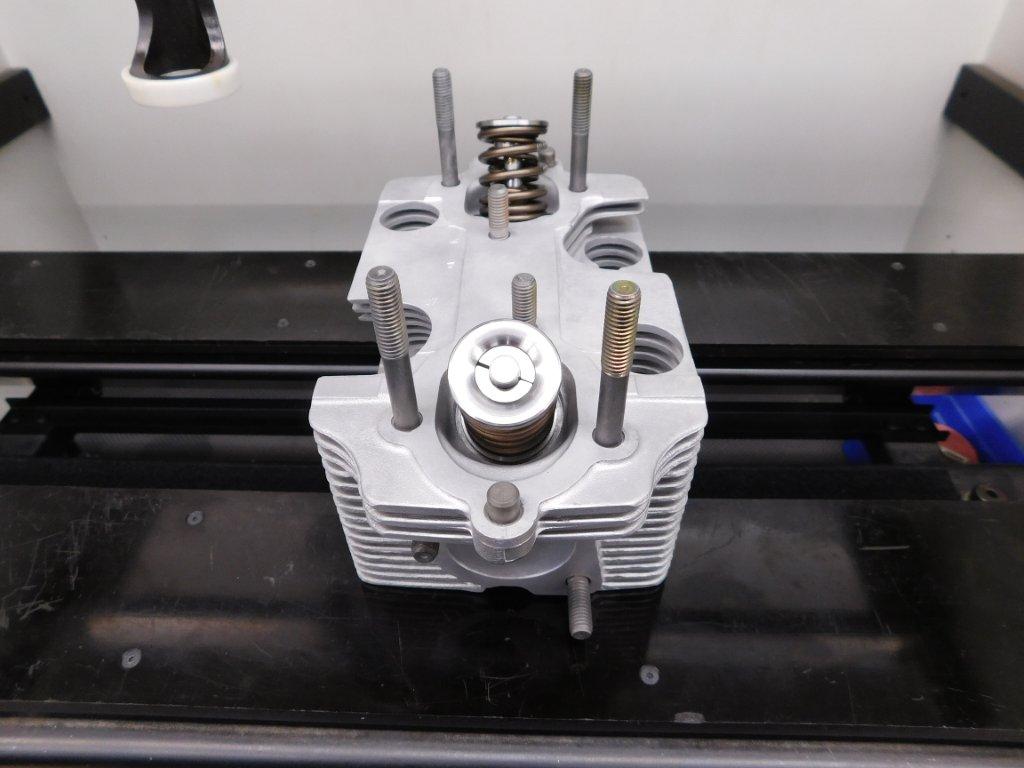
These images show the heads being assembled on our assembly machine. The reason we always clean the heads before we disassemble them is why this machine is kept clean.
This work is time consuming and often expensive. There are certainly places that offer this work and charge a lot less. The work required to rebuild these types of heads correctly should never be under estimated and limited to a set amount of time that coverts into a lower price. Car repair shop personnel and car owners rebuilding their own engines rely upon the machine shop to advise on what is required. Many have no understanding or knowledge of what is required and how this repair work should be done. It comes down to the machine shop doing what is right for the car owner, having pride in their work and wanting the cars performance at what it was designed to have.


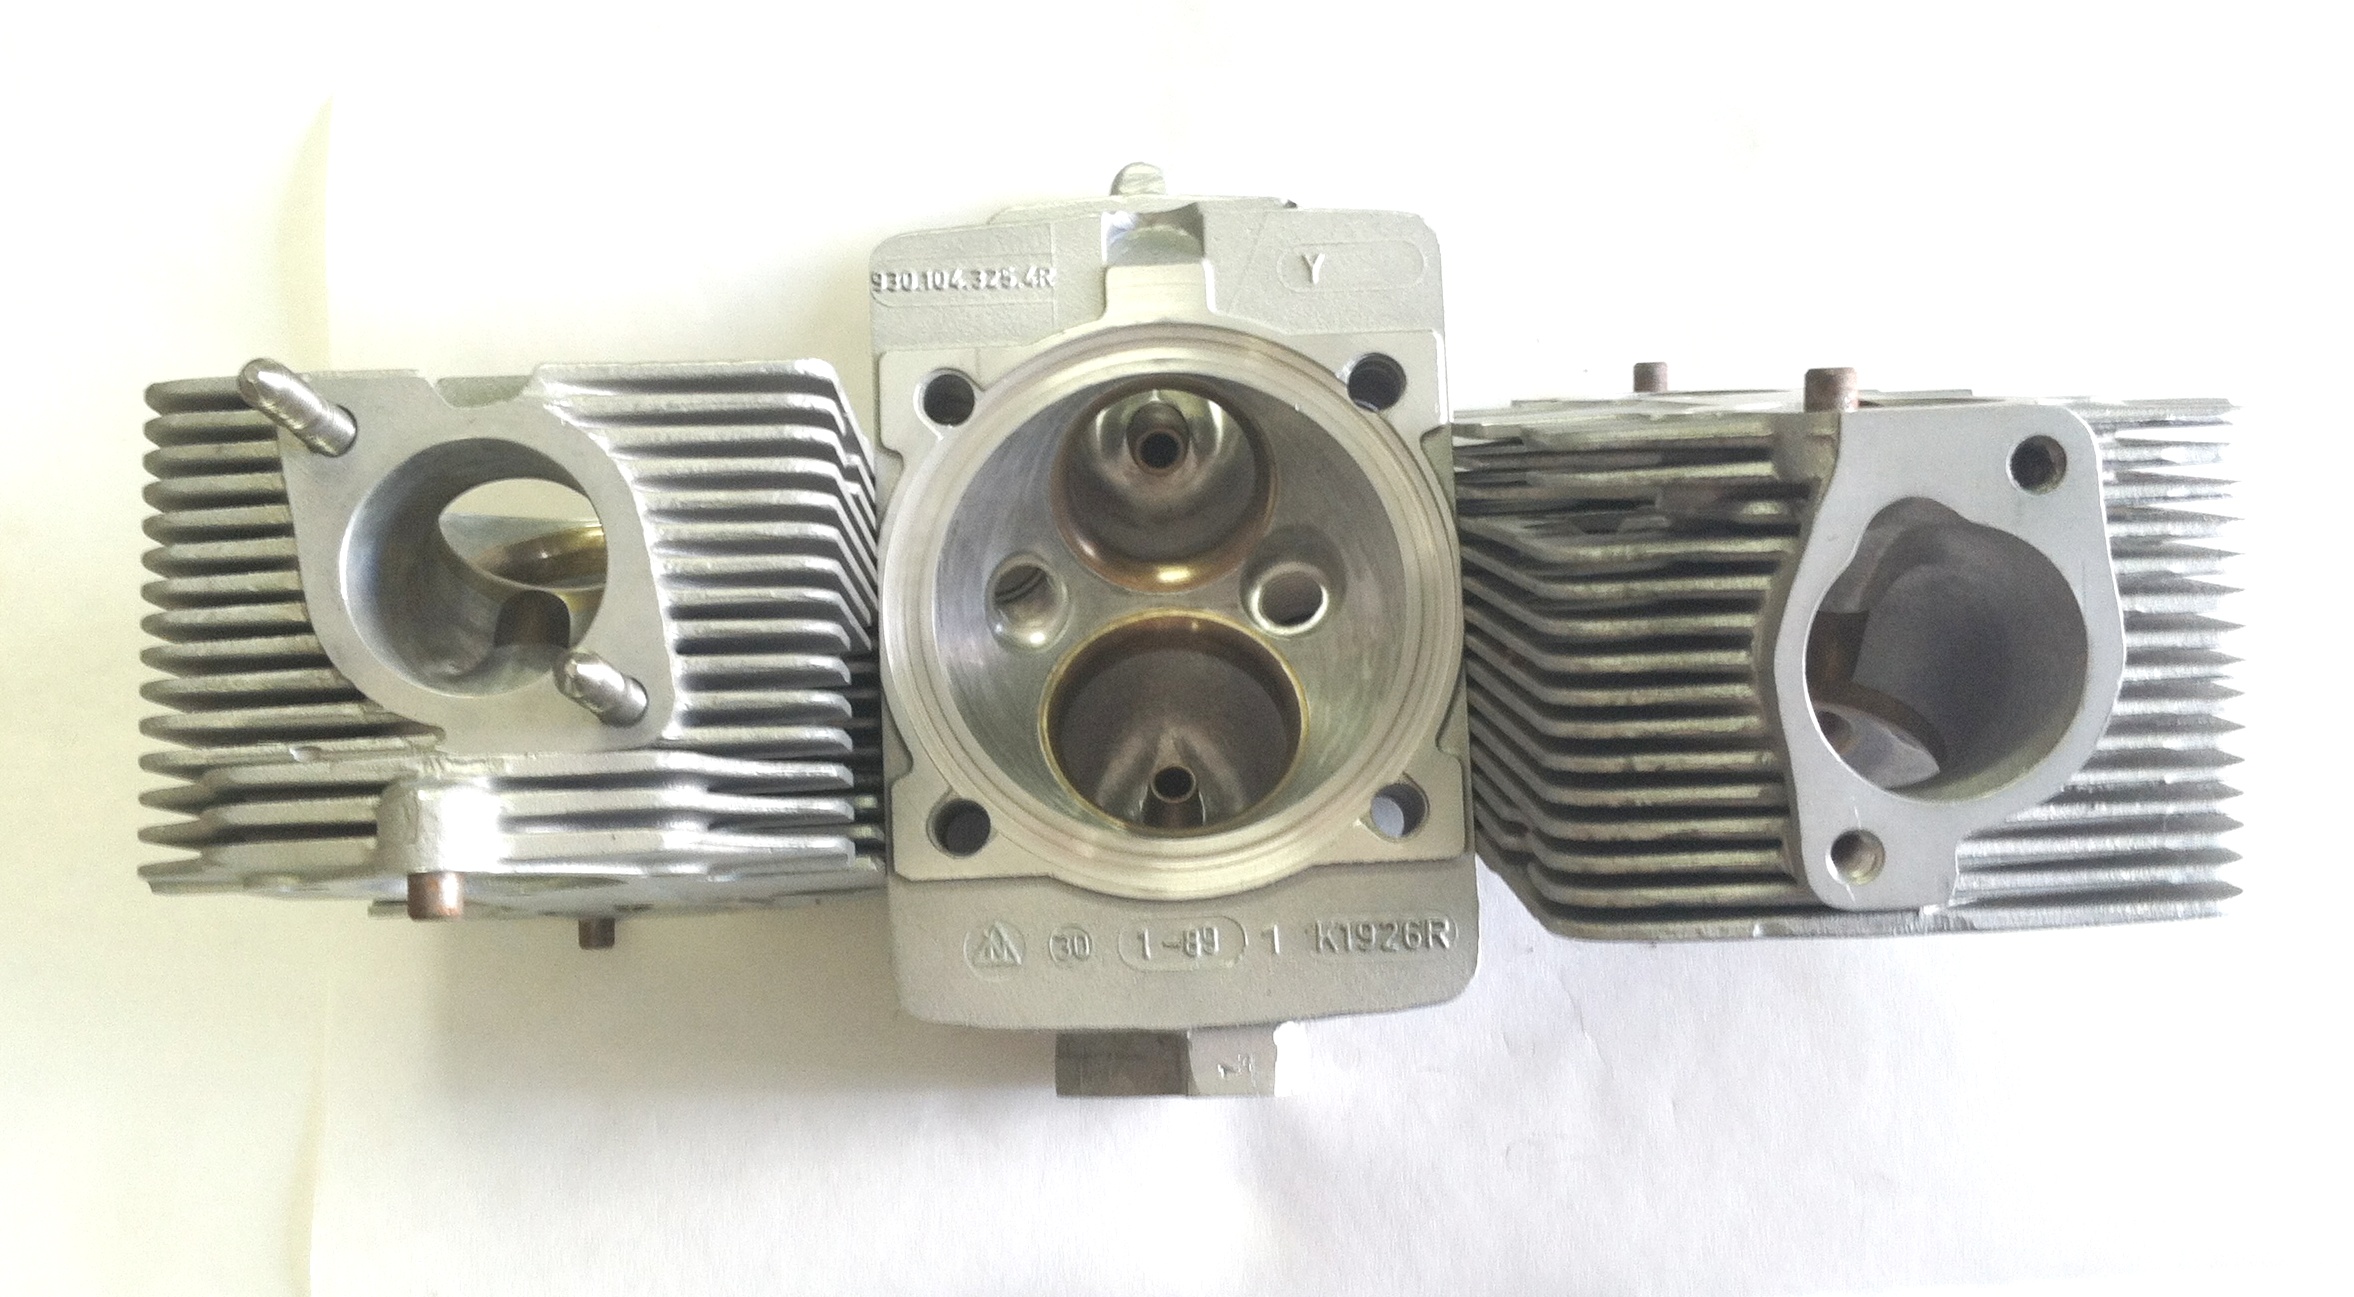
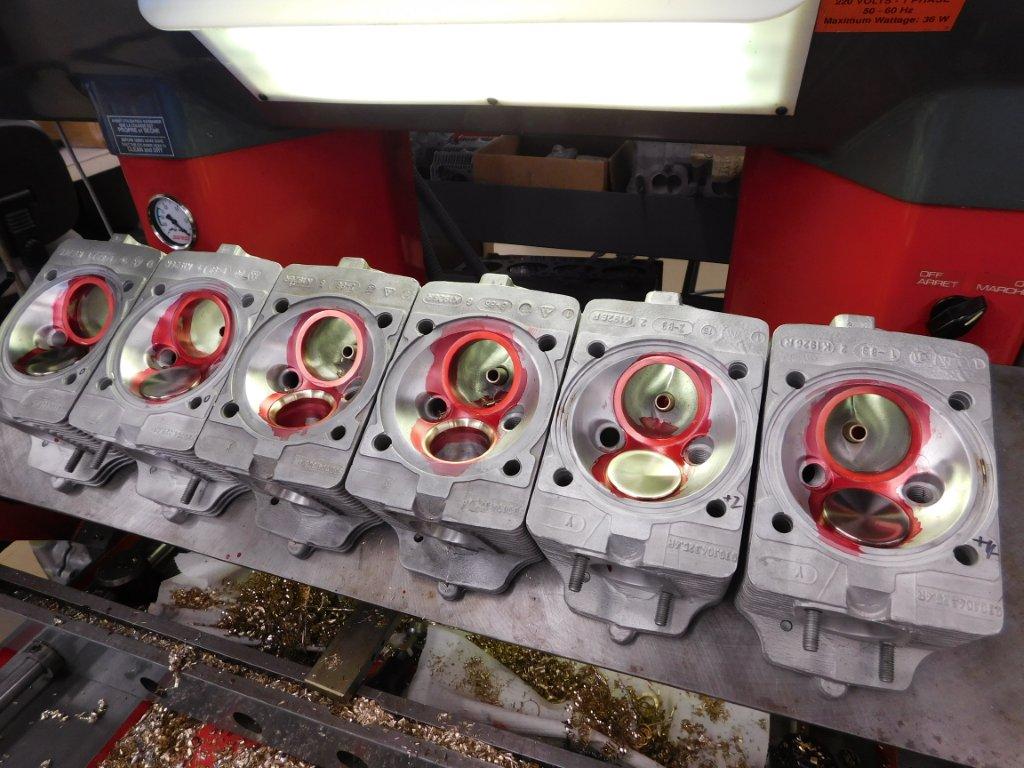
These images show different heads in their finished state. One shows the sealing system we developed for these heads with both a compressed sealing ring and head gasket that, once fitted, never requires the heads to be resurfaced.
Why do we go to these measures when rebuilding cylinder heads? Simple really. It is the correct way and all the performance an engine produces comes for the cylinder heads. We have found from years involved in racing, you miss a step or do not bother to check something, it will come back and cause an issue. Racing and street use make no difference to a cylinder head. Either use will keep you honest and humble you when it goes wrong.